• Skip to main content
  • Skip to primary sidebar
  • Skip to footer

Skipping Stone Design

Skipping Stone Design

  • Home
  • About
  • Health
  • Lifestyle
  • Tips
  • Budget
  • Travel
  • Contact

Tips

10 Essential Plumber Tools Every Handyman Should Know

October 15, 2019

There are more than 500,000 plumbers in the U.S. today. And just about all of them will tell you that they wouldn’t be able to perform their jobs without easy access to certain tools.

A plumber can have all the experience in the world when it comes to making repairs. But if they don’t have the right tools in their truck, they’re not going to be able to tackle plumbing problems and fix them.

If you’re a handyman who dabbles in plumbing every now and then, you should make sure that you have these tools nearby at all times. Here are 10 essential plumber tools that every handyman needs.

1. Plunger

The vast majority of plumbing issues within a home or business can be fixed with a simple plunger. From clogged toilets to slow-moving drains, you can get rid of many plumbing problems by turning to a trusty plunger.

2. Hand Auger

Although plungers are very effective as far as clearing clogs in a plumbing system is concerned, there are some stubborn clogs that you won’t be able to knock out with a plunger. When this is the case, it helps to have a hand auger around.

Also referred to as a plumber’s snake, a hand auger allows you to send a flexible metal cable down into plumbing pipes to clear a clog. You can remove clogs from toilets, sinks, showers, and more in a matter of minutes with a hand auger.

3. Adjustable Wrench

There are a variety of hand tools that every good plumber needs to have. You could argue that an adjustable wrench is the most important hand tool of the bunch.

Adjustable wrenches are designed to help plumbers and handymen alike tighten and loosen hex-shaped nuts. Whether you’re installing a new kitchen sink or replacing an old showerhead, it’s good to have an adjustable wrench that’s up for the challenge.

4. Tongue-and-Groove Pliers

Plumbers and handymen often have to work in confined spaces when working on plumbing projects. Therefore, it’s essential for them to have a tool that makes it easy to grab and pull on things that they need to tighten or loosen.

Tongue-and-groove pliers, also called Channellocks, are the perfect plumber tools for this exact purpose. Whether you’re trying to get to something that’s difficult to reach or attempting to hold something in place, tongue-and-groove pliers will get the job done.

5. Basin Wrench

The nuts that hold sinks in place can be almost impossible for you to reach with a regular wrench. There isn’t enough room for you to fit a wrench and use it.

It makes basin wrenches invaluable plumber tools for those who are frequently tasked with installing and removing kitchen and bathroom sinks. These wrenches have a long shaft, as well as a swiveling jaw, that can lock tight onto nuts located behind sinks and help to tighten or loosen them.

6. Hacksaw

If you spend enough time working on plumbing systems, there will come times when you’ll need to cut plumbing pipes, hardware, and even nuts and bolts to remove them from a plumbing system. A good hacksaw will help you do it.

Hacksaws can be used to cut everything from metal and plastic plumbing pipes to the nuts and bolts that are used to keep them in place. Just make sure you have plenty of fresh blades for your hacksaw in your toolbox so that you don’t ever get stuck trying to use a dull one.

7. Pipe Cutters

When you’re installing new plumbing pipes in a plumbing system, you’ll often need to cut them down to size so that they’ll fit. Pipe cutters will help you carry out this task in no time.

Pipe cutters should be able to tackle both metal and plastic plumbing pipes without a problem. You can cut plumbing pipes so you can install them and ensure that they fit properly.

8. Metal File

After you cut metal plumbing pipes, the edges of them will be anything but smooth. You shouldn’t install them until you’re able to file down the rough edges.

Keeping a metal file in your toolbox will make it super easy to do away with rough edges on metal plumbing pipes. There are half-round metal files as well as rat-tail metal files that can handle the edges on any metal plumbing pipes with ease.

9. Plumber’s Putty

Plumber’s putty is a moldable material that can be utilized to create watertight seals around plumbing pipes. It should not be used on pipes that are going to be subjected to pressure. But it’s great for using on drainpipes and other plumbing connections where pressure isn’t a factor.

One thing worth noting is that plumber’s putty is not the same thing as duct sealant, which is another soft compound that handymen can use for HVAC projects. When you compare here, you’ll see what sets plumber’s putty apart from duct sealant.

Make sure you use plumber’s putty on plumbing jobs and save duct sealant for HVAC repairs.

10. Propane Torch

If you feel comfortable using one, a propane torch is a great tool to have around when you’re working on plumbing projects. It can be used to solder copper plumbing pipes and to make repairs to them.

Look for a self-igniting torch that won’t require you to carry around a pack of matches with it.

Add These Plumber Tools to Your Toolbox Today

When you have all of these plumber tools in your toolbox, you should be ready to tackle any plumbing project. It’s a good idea to invest in them before you start providing handyman services.

It’s also a good idea to buy high-quality tools if you plan to work on plumbing systems. Your tools are going to get put to the test early and often, and the last thing you want is for them to give out on you right in the middle of a plumbing job.

Now that you have the tools you need, check out our blog to learn more about some basic plumbing repairs.

Filed Under: Tips

When Disaster Strikes: How to Store Water for Emergencies

October 10, 2019

According to the CDC, drinking contaminated water can cause health problems such as neurological disorders and gastrointestinal illnesses. Unfortunately, you may have no other choice in the event of a storm. A natural disaster can disable or contaminate public utilities.

No matter where you live, it’s important that you keep emergency drinking water nearby. But how much should you store? And do you know how to store emergency water?

Don’t go thirsty during an emergency. Read on and discover how to create a safe emergency water supply for you and your family.

1. How Much Water Should I Store?

Utilities such as water and electricity may be contaminated during a tropical storm, earthquake, or other disasters. An emergency water supply is an essential addition to any home emergency kit.

But how much water should you store? Every day, the average person or pet will require a gallon of water. Keep these guidelines in mind as you amass your emergency water supply.

A family of three with two pets will consume five gallons of water daily. Once you know your daily intake, you’ll have to decide how many days you want to prepare for.

Of course, there’s no way of knowing how long a storm may prevent access to clean water. For minor emergencies, three days of emergency water storage is more than enough.

But not every emergency is minor. For additional safety, it’s advisable to have at least a week’s worth of water. In this case, a family of five will want to store 35 gallons of water.

If you live in an area that experiences frequent storms and flooding, you may want to save water for a two-week period. Due to perspiration, save extra if you live in a warm climate.

2. Emergency Water Storage Options

Countless options are available for a small supply of water. The easiest and most convenient choice is buying a pack of store-bought water. It’s easy to pick up a pack of at least 24 bottles.

Eight of these bottles is equal to a gallon of water, or your daily water supply. So a typical pack of water bottles will last the average person three days. If it seems like a lot, keep in mind that a portion of this supply is meant to cover your hygiene needs.

But what about larger storage options? Portable water jugs are a great choice, though they can become unwieldy past the eight-gallon mark. Purchase a variety of these jugs and keep them in a dark and cool location.

If you’re planning for larger emergencies, turn to a water barrel. You can find drums that hold up to 60 gallons of water. Choose one that’s BPA-free and food-safe, otherwise, you’ll contaminate your supply.

There are some amazing in-home solutions if this seems like too much of a hassle. You can install an in-line tank in your own home, so you’re conveniently prepared in case of an emergency. These tanks don’t require any storage considerations.

Find out more about the best in-home water tanks.

3. How to Store Emergency Water

Small, store-bought water solutions don’t require much fuss. Find a cool place to store them in your home and forget about them. You’ll have a more complicated time of things if you purchase drums, barrels, or jugs.

Why? Because you may have to keep these large containers outside on the cement. Water may leech chemicals and flavors from the cement over time. For that reason, most preppers suggest keeping containers off the floor with a pallet or cardboard boxes.

There’s one more thing. If you’ve filled a drum or jug with your own water, you may want to treat it first. Tap water is fine since it already contains chlorine.

When your water source is missing this antimicrobial agent, be sure to add some yourself before sealing the container.

4. Maintaining an Emergency Water Supply

Water doesn’t expire. However, it can certainly become contaminated or pick up unpalatable tastes during storage. For that reason, it’s important to rotate your water.

The Department of Homeland Security suggests swapping the water out every six months. Many preppers suggest doing so once a year. And some even say that, under the right conditions, you don’t have to rotate water at all.

The choice is ultimately up to you. But if the water looks, smells, or tastes contaminated, that’s certainly a good sign to replace it.

5. Alternative Water Treatment Options

If you’re not using an in-home tank, you should consider having water treatment alternatives on hand. After a storm, your water could become inaccessible or contaminated. That’s why it’s better to have a backup plan prepared.

Although you can boil water to kill most pathogens, this won’t be an option. Your gas and electricity should be disabled during a storm. You may be able to boil if you have a small, portable stove that doesn’t need home utilities.

Otherwise, you can rely on purification tablets. These are either iodine or chlorine. You’ll want to rotate purification tablets as these can expire after several years.

Get Prepared Before an Emergency

You know how to store emergency water, so you should start right away. Even if you don’t need it, the peace of mind is well worth the cost.

Don’t wait for an impending storm to strike nearby. You can’t be warned of every natural disaster in advance. Instead, prepare an emergency water supply as soon as possible, as well as a disaster kit.

Want more great advice? Consult the health and home categories on our blog.

Filed Under: Tips

This Old House: The Pros and Cons of Buying a Historic Home

October 7, 2019

Around 20 percent of Americans say that they’re living the American dream.

The cornerstone of the American dream is to own your home. But, what is your dream home?

You may not be able to imagine a more beautiful home than a historic house. And yet, living in a vintage home isn’t without downsides.

Check out the pros and cons of living in a historic home below. Let’s go!

The Benefits of Buying an Old House

There are a bunch of reasons why people buy historic homes. Popular reasons include the following:

1. You Want a Home With Character

You don’t want a cookie-cutter for a home. You want a home with a unique character and history.

You want to experience going through time when you enter your home. As you walk up to the home, you get to knock on the authentic original doorknob.

You make your way through the charming hallway and you’re constantly surrounded by vintage details.

If you want a unique home with its own history, then an old house will give you plenty of material for you to get your teeth into. You also get the opportunity to play a role in the incredible history of the building.

2. Beautiful and Charming Home

Your home could be Georgian, Victorian, or Colonial style architecture. Modern-day homes don’t have anything on the beauty of the old days.

If you prefer an older home with beautiful features, then you’ll take a lot more pride in living in this home. It’s simply about having great taste.

3. More Money in Your Pocket

There are also financial reasons to buy a historic home. The government and society want to keep historic homes preserved.

If you’re willing to purchase and maintain an old house, you may be able to get tax incentives and lower interest loans.

If you’re worried about whether your house price will fall, a historic house is a safe choice. Historic homes are rare so they’ll keep their value.

The Downsides of Buying an Old House

However, historic homes aren’t for everyone. There are reasons why many people would rather live in a newer build.

1. Time Consuming

You may get to enjoy living in a beautiful old home. But, you also have to put in the hours to keep it looking its best.

There are often electrical issues or water damage which you need to handle when you move into a historic home.

2. Red Tape to Follow

If you move into a historic home, there are likely to be strict rules to follow. Therefore, you may not have much freedom to renovate or make changes to the building.

Want an extension? You need to get in touch with the city. There are so many hoops to jump through if you want to make any changes to the house.

3. High Home Insurance

If you want to move into an old house, you may discover that your home insurance actually goes through the roof.

In fact, many insurance companies won’t even provide any coverage for homeowners with historic buildings.

Buying a Historic Home

The decision to buy a historic home is a big one. You need to ensure that you’re prepared for the work and effort of preserving the building.

But, you can’t really put a price of being part of a charming home’s history. If you want more housing and design advice, check out the rest of our website.

Filed Under: Tips

Build Smart: 7 Key Things to Consider Before Building a Smart Home

September 29, 2019

The modern home is filled with amazing features to optimize our comfort.

Genius inventions like heating and air-conditioning, lighting, and coffee makers (God bless Melitta Bentz!) give us options to customize our lifestyle however we want.

It’s hard to imagine getting any better than having these inventions in our lives… but it does!

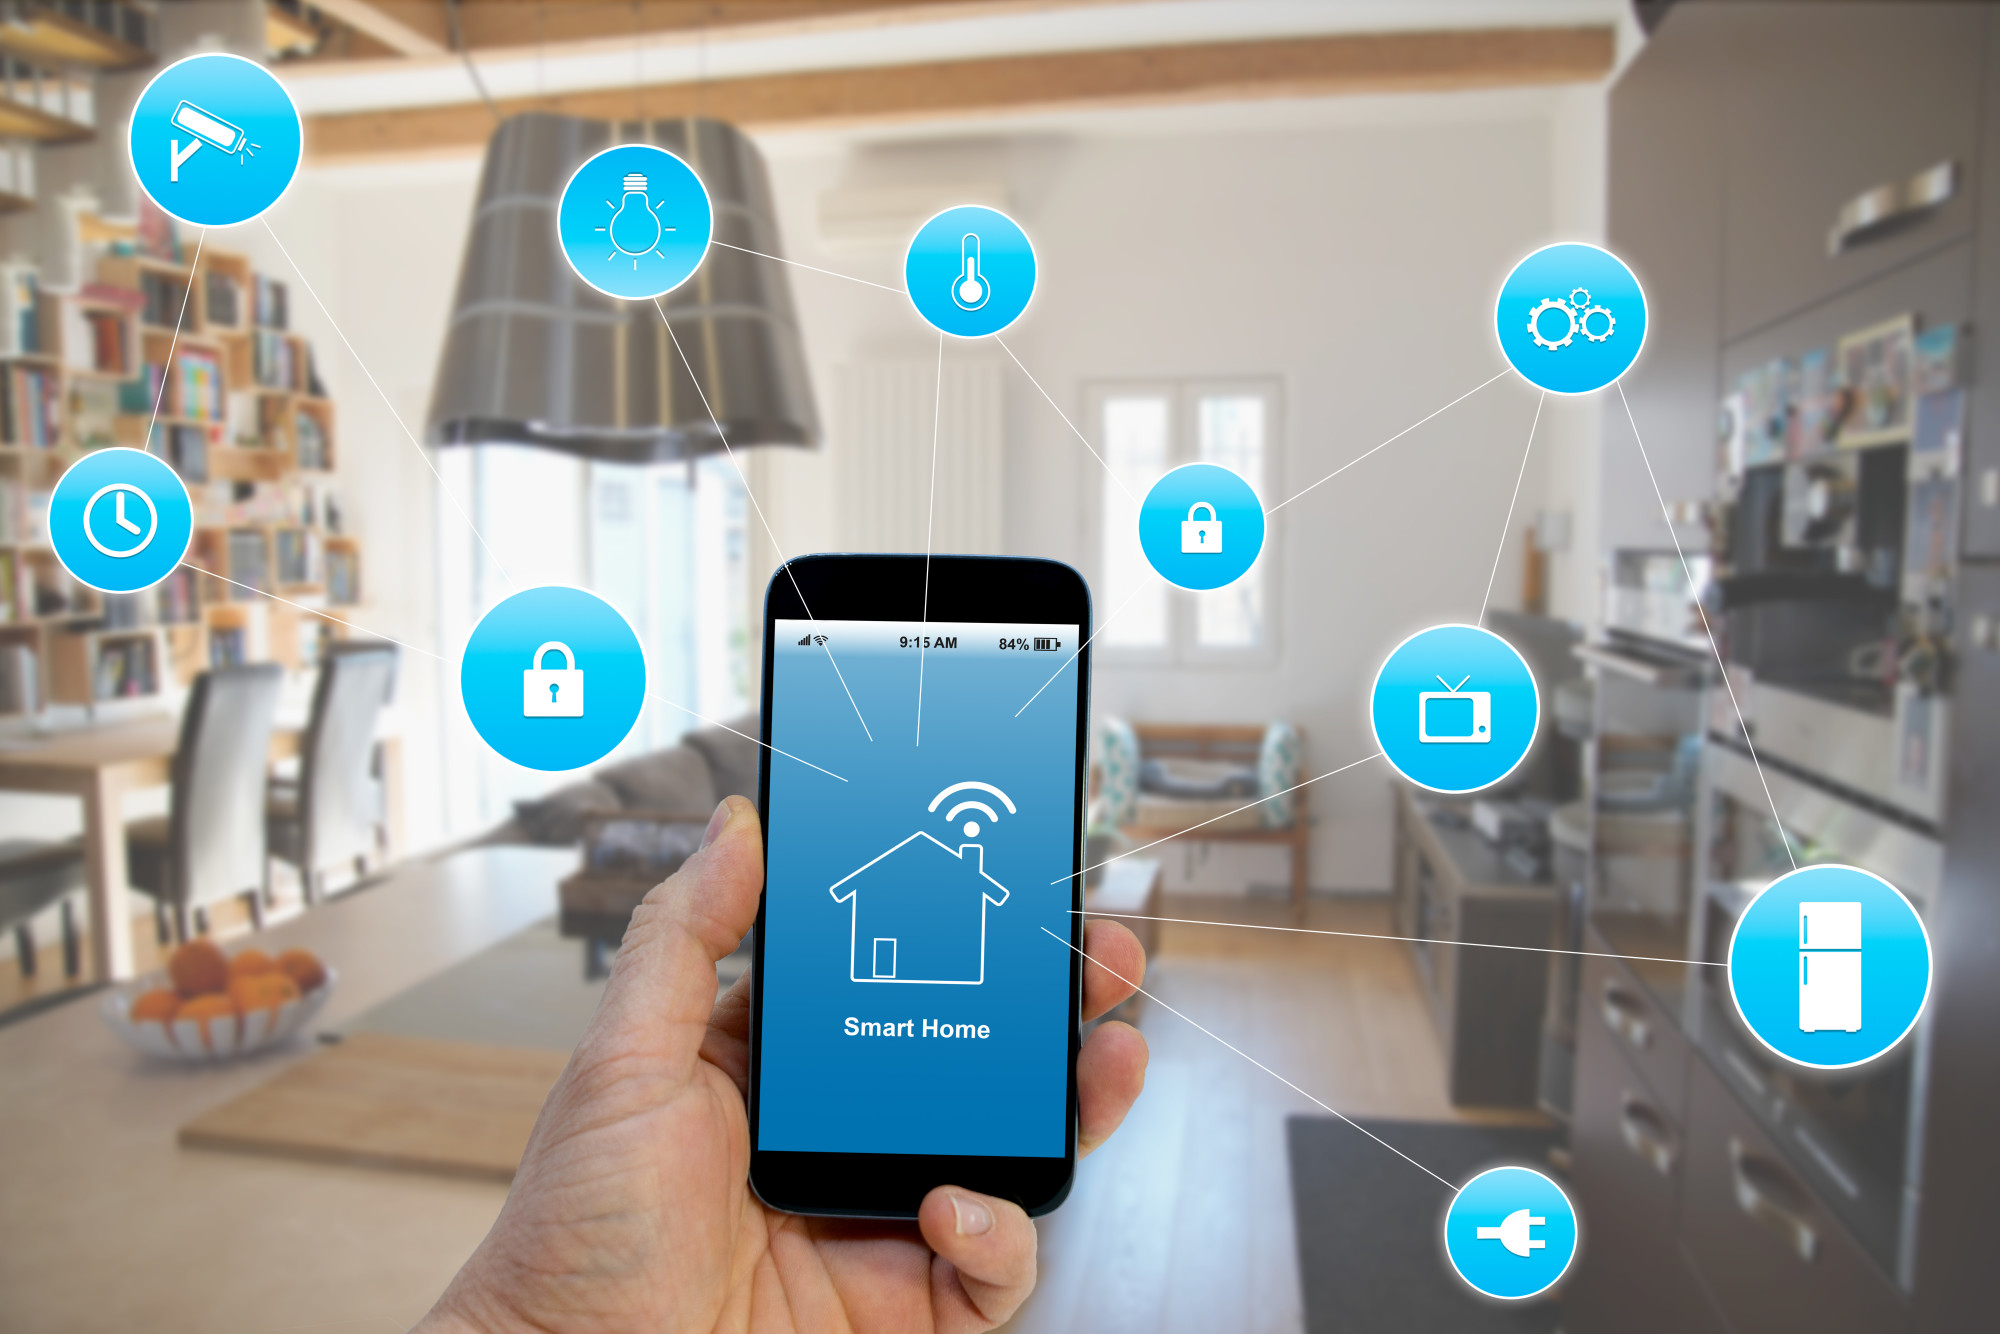
Now, thanks to the smart home, you can customize the time and efficiency of each of these features to fit your lifestyle down to the very second you need it.

But before you go building the central hub of all this, there are things you need to weigh out.

Here are 7 ideas to think through before you build smart!

1. What Devices Do You Have in Mind?

Just because you have the ability to automate every amenity in your household doesn’t mean you have to.

Remember that with every device you automate comes an extra cost attached. So it may not make sense to attach features you rarely use onto your smart home system.

The best way to approach this is by writing out a list of every feature in your house that CAN be automated.

Once you’ve done that, sit down with your family and carefully weight out which ones definitely need to be automated and which ones you’re fine with not automating.

The key to this entire process is cutting out as many extra costs for yourself as possible. Comprising an honest list will help get at the forefront of that by eliminating costs that others start out buying and never using.

2. You Can Always Add On Later

It’s understandable that you’d want to create an all-encompassing smart home to be reckoned with in one go-around.

However, there’s no rush to if it doesn’t make financial sense for you and your family to do right away.

One of the things most people forget is that you can always add new features to your command center as you go along.

This is often the best way to go about it so that you aren’t buying features you’ll never end up using.

Buy a product or two at a time, incorporate them, and get the hang of their features. If you then find another product or two that can compliment your system, then it’s time to rinse and repeat!

3. You Need A Reliable Wi-Fi Router

While this may not come as a huge surprise, the smart features that you’re hoping to incorporate into your smart home system will lean on your Wi-Fi to do it’s bidding.

Needless to say, the more features you add, the more you’ll need a strong router to carry the load.

Sadly, your current router may not be up to par. However, there are several tremendous options to choose from, no matter what your budget might look like.

If the necessary router winds up being a bit pricier then you were hoping, it may be a good time to try out the “buying a few products at a time” recommendation listed above.

Whatever route you decide to go, it’s highly recommended that you buy the router from the get-go and save yourself a few hundred headaches.

4. What Does Your Schedule Look Like?

The main satisfaction of incorporating a smart home in your house is the convenience it provides you.

Do you need coffee made precisely at 6 am each morning? No problem.

Don’t want the lights turned on in the house until 15 minutes before you typically arrive home around 5:30 pm? The smart home has got your back!

Whatever your schedule looks like, write it out and take a gander at what trends you see.

What conveniences can a smart home system offer you to help in your daily grind?

If the answer isn’t as significant as you were hoping, maybe it’s best to hold off for a year or two.

5. Will Your Landlord Allow It?

If you’re renting your house, this should be the first consideration that you make.

You don’t need to ask them right away, but make sure to rummage through your rental agreement and see what the regulations are on drilling holes, adding amenities, etc.

After that, be sure to lay down a “blueprint” of the smart home you’re looking to build and present it to your landlord.

Be sure to get specific with where you hope to put everything, the amount of drilling you’ll need to do, etc. The more info you can give them, the better!

6. Are You Equal to the Task?

Alright reader, it’s time to take a deep look inward and be honest with yourself…

Are you the type of person that’s capable of installing this on your own?

When things go wrong, as they often do when technology is involved, are you equipped with the necessary amount of troubleshooting?

If your answer is “absolutely not”, then it may be best to seek the opinion and help of a professional.

However, if your answer was “I think I can”, then maybe your little engine can successfully install it with the help of https://aconnectedhome.com/.

7. Is It Worth the Cost?

Time for one more round of self-reflection. Is the smart home worth the money for you and your family, or is it more out of want than a need?

Make no doubt about it, a smart home will payout in its operations once you’ve successfully built it… but that’s not the question here.

Will a smart home actually help optimize your lifestyle, or are you just trying to keep up with your friend who built one in their house?

While completely worth it, the cost associated with building a smart home can be overwhelming if you’re not prepared.

Take the time to budget and save up for your dream smart home!

Build Smart, Think Smarter

If the opportunity to build smart devices in your home makes sense for you and your family, then congratulations!

Be sure to keep up with Skipping Stone Design for all the latest ideas on lifestyle and design.

Best of luck with your smart home integration. You’ll come out wiser in the end for your efforts!

Filed Under: Tips

Landlord Rule No. 1 – Always Get It In Writing

September 29, 2019

If you’re just starting out as a landlord, there can be a lot of different concepts to take in.

Depending on where you’re operating your business, local laws dictate all sorts of things in relation to your job as a property manager, from how long a lease you can rent your unit for to regulations that affect how you collect and store security deposits.

Of all of the advice that you get as a landlord, though, one of the most important takeaways is to “always get it in writing”. Read on to learn why this should always be considered landlord rule number one.

Contracts protect you and your business

The first reason to always get things in writing from tenants is because it helps protect you from legal action. Even if you’ve thoroughly vetted a tenant with background checks, you may not realize that they have a litigious streak.

If you aren’t prepared to provide evidence to substantiate your side of the story, it can be a tedious battle of he said/she said, and depending on the state you work in, it may even cost you thousands of dollars in fines. The city of Chicago, Illinois, for example, is one of the hardest cities when it comes to winning cases as a landlord.

However, if you have signed, written proof of an addendum to the lease or any other alteration to the lease, you will be protected in a court of law. Using free landlord software like Turbo Tenant can help you set up comprehensive contracts and other lease-related documents, and it even allows for online signing.

Verbal isn’t good enough

A common interaction between a tenant and a landlord involves a phone call from a tenant during an emergency. Perhaps there’s a radiator from the floor above leaking into the apartment, or you’ve had multiple calls to complain about raucous noise from one of your tenant’s neighbors.

In these situations, while a phone call is one of the most immediate ways to relay information between both tenant and landlord, it doesn’t leave a written record. This can be a problem if you’re ever taken to court, since that makes it hard to establish an objective view of the situation.

One thing you can do to remedy this situation is to send an email to your tenant after you hang up the phone, reiterating what was discussed and any timeline you gave for action to be taken. An email is the perfect medium for this sort of interaction for a few reasons.

For starters, it is a time-stamped medium, meaning that the tenant can’t claim that you haven’t resolved their issue within the timeframe you agreed upon over the phone. Secondly, an email is a written record and emails can be used as evidence in a court of law. Finally, having an email leaves the window for communication open. If a tenant disagrees or misunderstood something you said on the phone, they can respond to your email to further discuss the problem, continuing a paper trail.

As you can see, it’s vital that you get things in writing when you’re communicating with your tenants. Doing so doesn’t just ensure that you both understand what you’re agreeing to; it also protects you if you’re ever taking to trial by an angry tenant. By protecting yourself, you are also protecting your business and your investments, ensuring that you can continue working as a property manager for many years to come.


Filed Under: Tips

How do you make your home more attractive?

September 23, 2019

Home staging is very popular these days. Many people decide to improve their house decor before selling it. By ‘home staging’ we mean the upgrading – literally ‘staging’ – of real estate. This method has some basic rules and doesn’t require significant investments, at least not more than 5% of the selling price, so that everyone can benefit from it.

Make your house interesting

Start by remedying all those little ailments in the home that you no longer pay attention to: the cupboard door hanging on half-past six, the tile that has cracked, the electric wire that lives its own life. What is more: remember to clean the house from head to toe. Clutter, dust and grease stains have nothing attractive at all. If the walls need to be refreshed, it has to be done, but use neutral colours such as white or, even better, beige. Your personal taste must be ignored.

Make the interior impersonal

The overall idea of home staging is that the buyer is given the freedom to introduce themselves in your interior. That is the reason why you should make your interior as impersonal as possible. Put family photos in a box, as well as all kinds of collections and personal items. In addition, you must clean up. It is difficult to see the potential of a room if you can struggle between the cocktail chair and the low table with difficulty.

Make more space

Incidentally, furniture that is too large tends to eat centimetres and make a room appear smaller than it actually is. Emptying a place, even partially, will reveal small and large defects. In this case, you hide it as much as possible and use tricks that are as cheap as possible to hide this small ‘suffering’, on the condition that it remains as neutral as possible. All kinds of plaids, pillows and frames are your allies.

First impression matters

If your furniture is no longer the youngest, don’t hesitate to paint it. The same applies to a dated tile. You don’t have to ensure the sustainability of the place, but make it attractive for a first glance. Try to look at your interior through the eyes of an outsider. The good thing about home staging is that these straightforward rules are not only applicable when you are about to move, but that they also do wonders when it comes to falling in love again with your walls.

Remember about the garden

When home staging, you must also remember about your garden! A few rules also apply to this area. The border or the fence are the first things to see when visitors arrive. If these are scots and crooked and perhaps have seen better days, you have to tackle them.

The devil is in the details

Mow your grass, water the plants and don’t hesitate to plant some new flowers here and there. Also remember to maintain the trees and shrubs, especially if your future buyer is not a family of Tarzan! Don’t forget the letterbox and the bell. Also, make sure that the shed and the garage are cleaned up. These are huge selling points; you must do everything to make the buyer aware of this. Also remember to collect the slide, swing and sandpit in a corner so that they do not give the idea to flood the whole.

Replace the garden furniture, change the cushions on it and throw a beautiful tablecloth in cheerful colours over the old, shaved table. Finally, you can possibly use string lights, but be careful not to turn it into a branch of the fair! If you want to be inspired by beautiful houses, visit the Real estate in Sea Pines SC.

Conclusion

As you can see, many various things can be improved before selling your house. With home staging, you can sell your house even twice faster! We hope that our tips will help you during this critical time in your life.


Filed Under: Tips

Why It’s Important to Have Routine Pest Inspections

September 11, 2019

Household pests are a common problem. Bedbugs, moths, termites, mice, and fruit flies are just a few common pests.

You might consider these to be nuisances, but they can do a lot of damage to your home if you pretend that they don’t exist. Pest inspections are a way to help you identify and get rid of these pests before they become a major problem.

How can pest inspections help your home and your family? Read on to find out.

1. Protect You and Your Family

The main reason why you want to have a pest inspection is to make sure that you don’t have pests inside the home.

Pests can get into your cabinets and contaminate your food. The worst part is that you probably don’t even know it. That is until it becomes very obvious that you have pests lurking in your pantry.

Pest inspections will help you identify when you have pests in the pantry and protect the health of your family.

2. DIY Doesn’t Always Work

You might be tempted to do pest control yourself. The issue with that is that you’re not trained to look for certain types of pests and how to make sure they disappear.

You may be able to spot when termites are doing major damage to the wood

Plus, your schedule is probably packed with other things to do. It would be all too easy to let something like pest inspections slide.

You’re much better off calling a pest control company and having them handle the inspection and treatment.

3. Protect Your Wallet

There are bugs that will eat just about anything. Old documents, family photos, and hard to replace items. Bedbugs can live in mattresses. Some bugs like to live inside the walls.

If you have an issue with bugs and pests, you’re going to have to replace these items. Some of them can’t be replaced.

To make matter worse, your homeowner’s insurance may not cover pest issues, so those replacement and repair costs may be out of pocket.

4. Maintain Home Value

It’s well-known that termites can cause major damage to your home’s structure. Once that’s compromised, you’re in for major repairs.

If you’re planning on selling your home, you will have to come way down on the listing price because the buyer will want to have those issues repaired. Either way, it will cost you a lot of money.

5. Sleep Better at Night

Have you ever tried to sleep after seeing a bug or mouse before you shut out the lights? It’s pretty creepy, and it can impact your sleep.

You want to make sure that you have pest inspections to deal with these issues so you can get a good night’s sleep every night.

Regular Pest Inspections Are Worth It

What’s your health and home worth to you? They’re worth an awful lot to you, and you want to do everything you can to protect yourself and your family.

Regular pest inspections will make sure that your home’s structural integrity is intact. They’ll also ensure that your family is healthy, and your food isn’t full of critters.

Do you want more tips to maintain a healthy home? Check out the articles in the Health and Lifestyle sections of our blog for more articles.

Filed Under: Tips

What Type of Paving Should You Choose for Your Driveway?

September 10, 2019

Your choice of paving for your driveway is a very important decision and one you’ll have to deal with for years to come. The type of paving you choose will have a direct impact on your house’s exterior appearance and will also impact its value and how attractive it will be to prospective buyers.

A picture containing building

Description automatically generated

Choosing the wrong type could also cost you more in maintenance depending on how you intend to use your driveway and the weather conditions. This is why you can’t make this decision haphazardly and you have to know the pros and cons of each paving option, so you can make the best choice for you. Here’s a rundown of a few popular options and what they have to offer.

Asphalt

Asphalt is one of the most popular paving options and it does have its benefits. For one, it is easily the cheapest of all options. However, it’s not necessarily the most aesthetically pleasing. While an asphalt driveway will look great when new, it can start to slowly fade after a while. But this can be fixed with asphalt resurfacing.

Asphalt is also a very flexible surface and a great choice if you’re going to be doing some dirty work on the driveway, like mechanic jobs, for instance. However, it is not the most durable option, and you may have to do many repairs if you’re living in an extreme climate.

Concrete

Concrete can be a great option for many reasons. One of the reasons why concrete is so popular as a building material and on public roads is because of how durable and long-lasting it is. A properly installed and maintained concrete driveway can easily last as long as 40 years. Most concrete mixes used for driveways also allow rainwater to permeate through the surface, which limits runoff and allows for groundwater recharge.

It’s also a very sustainable material, looks great, and can handle heavy-duty usage. One of the only downsides with concrete is that it can be prone to cracking. However, this can be solved by using sealers. Sealers can limit damage if you’re dealing with a very damp climate or if you often have to use de-icing agents. Contraction joints also allow cracking to be confined to specific areas, which will allow you to save on repair costs.

Pavers

Pavers are also a very popular option that you can consider. The thing that stands out the most about pavers is their appearance. Pavers will instantly add curb appeal to your property and come in many shapes, sizes, and colors.

Pavers joints are also permeable, which allows rainwater to seep through to the ground. The only issue with pavers is that they tend to be expensive. Another issue is that it can be difficult to find the exact type of paver you had installed in case you have to make repairs, so you may not get a uniform look if you need to replace one or a few pavers.

Conclusion

Now that you know a bit more about major paving options, you’ll be able to make a better decision. Make sure to take your local climate, budget, and potential resale value into consideration when picking any option.


Filed Under: Tips

11 Benefits of Aluminum Siding for Your Home

September 9, 2019

Aluminum siding can be a great asset to your home. It is available in many colors and patterns, insulates your home well, and is pretty easy to maintain.

Plus it can give your home an attractive finished look, especially with some of today’s new color options contrasted with the right trim.

So if you’re interested in learning about the benefits of aluminum siding for homes, keep reading!

11 Benefits of Aluminum Siding

1. It is a good value. It is relatively inexpensive, low-maintenance, and long-lasting. Aluminum siding can last at least 40 years.

Aluminum house siding costs around $126-252 per 100 square feet, with an average installation cost of $270-486 for the same coverage amount. For an average house, this comes to under $4,000.

2. It’s easy to maintain.  A good washing about once a year and repainting every 10-15 years should take care of it.

3. Aluminum siding repels water and resists rust–both of which contribute to its overall durability.

4. Aluminum house siding comes in many attractive colors and contrasts well with various types of trim. Whereas aluminum siding used to come only in lighter colors, there are now darker ones as well.

Aluminum siding is available in a variety of patterns and textures, and it can be placed either vertically or horizontally on your home.

5. Unlike wood, aluminum siding is insect-proof on the outside. And, although insects can get into the wood underneath, the aluminum exterior is a deterrent.

6. Aluminum siding is also fire-resistant. It will not feed fires like other types of siding can do, and it will not burn or melt (only char).

7. Aluminum siding can be very energy-efficient. On its own, any type of siding only insulates your home to a limited extent but once insulation has been added to the back of aluminum siding the R-value increases significantly.

8. Aluminum house siding is completely recyclable! Not only does it last a long time, it never needs to be taken to a landfill.

9. Aluminum siding can be painted. More and more paints are available for aluminum siding specifically, and it only needs to be repainted every 5-10 years.

10. Aluminum siding doesn’t rot as wood does. Nor is it subject to tears as vinyl siding can be. It does, however, dent.

11. Aluminum siding is lightweight and relatively easy to install as a DIY project.

Aluminum Vs Vinyl Siding

Each of these two materials has its pros and cons. Since we’ve discussed the pros of aluminum siding, let’s look at how those contrast with those of vinyl siding.

the two types of siding are roughly comparable in price, although vinyl has a wider price range. Vinyl is said to be a bit less expensive and to insulate better (though both types benefit from added insulation).

Vinyl siding is not prone to dents, as aluminum is–although it can melt. While vinyl siding is fire-retardant, it does not offer quite the level of fire resistance aluminum does.

In short, the two types of siding are roughly equivalent in value. However,- we prefer the look and qualities of aluminum siding.

Where to Buy Aluminum Siding

Aluminum siding is available at most home supply businesses and national chains. It is also available through many independent contractors.

If you’re looking for aluminum siding in southern Ontario, check out The Trough Man in the Kitchener-Waterloo area.

Have We Covered It All?

We hope we’ve told you all you need to know about aluminum siding and its benefits. We certainly appreciate its durability, especially when maintained well.

We also like its smooth look and ability to be painted–which allows the look to be refreshed from time to time. This is good, too, since aluminum can last the better part of a person’s lifetime. Talk about cost-effective!

So be sure to keep aluminum siding in mind if you decide that your home needs to be re-sided at some point. Just give your local siding contractor a call!

Filed Under: Tips

11 Unforgettable Wall Decoration Tips to Liven Up Your Decor

September 9, 2019

Whether you just moved into a new place or are looking to redecorate, what you do with your walls affects the whole feel of the house. For example, if your wall is looking a tad bare, it makes the whole house feel plain and boring.

However, it’s not like college or high school where you can just throw up posters of your favorite movies or music. You’re an adult now, you need real decorations.

But what is real wall decoration? How can you use this giant display area in a creative, aesthetically pleasing, and appropriate way?

Well, you’ve got questions and we’ve got answers.

Keep reading for 11 excellent wall decoration ideas!

Unforgettable Wall Decoration Tips

Creating unforgettable wall decorations isn’t as difficult as it might sound. Just keep aesthetics in mind and perhaps ask a few trustworthy friends for their opinions as you’re designing.

However, remember that it’s your home you’re decorating! If you love the wall decoration you put up and others don’t care for it, decide how important their opinion is. You need to live in a space that expresses who you are, what you like, and what makes you happy!

Now, buckle-in for our top 11 tips!

1. Add Plants

First, you should look at adding plants into your decor. We’re not saying your wall needs to feel like a jungle, but some nice plantlife can really spruce up a “dead zone” on your wall.

Additionally, plants don’t just add an element of design into your home, they also come with many other benefits. For example,  plant life in the home has been shown to improve mood and productivity. They also help to reduce stress and anxiety.

Start to add by adding a few plants here and there, maybe even some bigger ones in the corner. Then, if you like the way plants feel in your home, you can start adding more!

2. A Wall Full of Books

One of the most impressive things you can see when walking into a house is a wall full of books. If you have a bare wall you need to decorate, install built-in bookshelves or large traditional bookshelves.

Then, start filling them with all the books you own. It’s oddly satisfying staring at an endless array of book spines on your wall.

If you already have quite a few books, this should be pretty easy. However, don’t bankrupt yourself buying books just to fill the space!

3. Hanging Mirrors

Next, if you’re looking for wall decoration ideas and don’t possess enough books to justify a wall of them, consider some decorative mirrors.

There are infinite mirror options out there, and most of them aren’t as expensive as you think. For example, there are sets of round mirrors that come in a myriad of sizes that you can arrange however you like.

Alternatively, you can spend a little more money and go for a large-scale, well-framed mirror for the centerpiece of the wall. It all depends on the look and feel you’re going for (and your budget).

4. Real of Faux Bricks

One thing most people underestimate while looking at wall decoration is just how much warmth a wall of bricks can add to a room. For example, a large room with bare walls can be magnificently accented with real or faux bricks.

After you’ve laid the bricks down, you can paint them whatever color you like. Keeping with the color of the room will keep it muted, yet still, show off the added texture. However, leaving the bricks raw and natural or painting them another color will highlight them even more.

5. Art Gallery

If you appreciate art or are an artist yourself, why not use one of your empty walls as a gallery?

While it may not adhere to classical wall decoration, a wall full of back-to-back art brings a lot of life and interest into your home. You can, of course, design it more classically, or you can go completely eccentric. That’s the beauty of owning your own space!

6. Venetian Plasters

If you’re looking for something a little extra, you should consider using Venetian plasters. This specialized paint is designed to create the illusion of depth and texture. However, because it is simply painted, it goes on quickly and easily.

You can get a Venetian plaster in a multitude of colors and faux textures. It’s a great way to add character and/or class to any room.

7. Add Minimalistic Shelves

We talked about a wall full of books earlier, now we’re going to go in a different direction. Minimalism is taking the world by storm, as we’re encouraging people to use less, buy less, and waste less.

However, you can also use minimalism as a fantastic base of wall decoration. Creating a wall full of built-in or floating shelves minimally decorated can add a lot of aesthetic appeal to a home. However, in this scenario, it’s a good idea to color-pop with your decor to really liven things up!

8. Large-Scale Art

Another great wall decoration option is using large-scale art. This can include tapestries, large-prints, large canvases, or even a mural.

If you’re an artist, this is the time to get creative. Figure out what colors and images would look amazing up there and get to work!

9. Board and Batten

If you’re looking for simple and elegant texture, consider adding board and batten to your walls. They work well to separate the upper and lower sections of a wall while creating depth and texture.

You can accentuate different sections by painting the board and batten a different color than the upper wall.

10.Hang Up Bikes or Other Big Objects

Another great way to make a large wall fell full and less boring is by hanging up big objects, such as bicycles, skis, snowboards, or other sports equipment.

However, you’re not solely limited to sports paraphernalia. You could also hang giant letters or sayings, flags, or other interests such as hunting weapons, etc.

11. Be Creative

Finally, we want to put a heavy emphasis on creativity. This is your home, your space! Do what makes you happy!

Use this as an opportunity to express yourself as creatively and artistically as you can. Go with an idea you think might be awesome, even if it’s untraditional or obscure.

Good Luck

Whatever type of wall decoration you choose, remember, nothing’s permanent! If you don’t like it, change it! There are so many options out there, you could even try something different in each room or change it up every couple of months.

Just remember to have fun and for more lifestyle inspiration, check out the rest of our articles!

Filed Under: Tips

  • « Go to Previous Page
  • Page 1
  • Interim pages omitted …
  • Page 18
  • Page 19
  • Page 20
  • Page 21
  • Go to Next Page »

Primary Sidebar

About

Hi and welcome! I’m Lenny, and this blog space is my Internet home. I write, I cook, and I design. I love to take pictures of all things food and home décor.

Recent Posts

  • 3 Signs Assisted Living Is Right For Your Older Parent
  • E-commerce Store Budget: 3 Tips for Beginners
  • 3 Tips For Setting Boundaries With Your Adult Children
  • 4 Biggest Mistakes People Make When Buying Property
  • 3 Tips For Designing A Beautiful Custom Kitchen

Let’s Connect

  • Facebook
  • LinkedIn
  • Twitter

Facebook

Skipping Stones Design

Latest

3 Signs Assisted Living Is Right For Your Older Parent

E-commerce Store Budget: 3 Tips for Beginners

3 Tips For Setting Boundaries With Your Adult Children

Footer

About

Hi and welcome! I’m Lenny, and this blog space is my Internet home. I write, I cook, and I design. I love to take pictures of all things food and home décor.

LatestPost

  • 3 Signs Assisted Living Is Right For Your Older Parent
  • E-commerce Store Budget: 3 Tips for Beginners
  • 3 Tips For Setting Boundaries With Your Adult Children
  • 4 Biggest Mistakes People Make When Buying Property
  • 3 Tips For Designing A Beautiful Custom Kitchen

Let’s Connect

  • Facebook
  • LinkedIn
  • Twitter

Copyright© 2025 · Dear Theme by Shay Bocks