• Skip to main content
  • Skip to primary sidebar
  • Skip to footer

Skipping Stone Design

Skipping Stone Design

  • Home
  • About
  • Health
  • Lifestyle
  • Tips
  • Budget
  • Travel
  • Contact

Home

3 Tips For Designing A Beautiful Custom Kitchen

October 4, 2024

If you’re ready to turn the kitchen of your home into the custom kitchen of your dreams, there are a few things that you’re going to want to consider before you just start making design decisions. And while you might have a good idea of what you want after having been using this kitchen for a while, there are still design principles that you’ll want to know about and consider when creating a custom kitchen that will work for you for years to come.

To help you know how to achieve this, here are three tips for designing a beautiful custom kitchen.

Use Corners Carefully

The corners of a kitchen can get pretty tricky from a design standpoint. There are many parts of a kitchen that, when put into a corner, may not actually work well. So before you design the kitchen, make sure you’re being careful with what you put in the corners.

For example, you’ll need to be very careful about the dimensions for things like your cabinets and appliances that you think you want to have come into a corner of the kitchen. Oftentimes, doors in corners may not open as far or as well as you’d think. And for cabinets or cupboards with knobs, the knobs could smash into the wall if you’re not careful. Sometimes, custom cabinetry may be the best bet for making the best use of the corners of your kitchen. So before you get your design set in stone, make sure you’ve thought about what you’ll be placing in the corners.

Lean Toward The Classics

When it comes to the overall design of the basics of your custom kitchen, you may still want to lean toward the classics even while putting your own personal stamp on the space.

While you might like the idea of designing your kitchen in a funky and eclectic way, if you think there’s a chance that you’ll ever move from this home, you may still want to incorporate classic styles into the structure of your custom kitchen. This will help to make it more appealing for future buyers.

Prioritize Convenience

As you think about the layout of your kitchen and what custom items you want to include in your design, make sure you’re prioritizing convenience, both with moving around your kitchen and actually using it to cook.

To make your kitchen as convenient for you as possible, consider how you want the layout of the stove, sink, and refrigerator. You’ll also want to make sure that you strategically place your outlets near areas where you’ll want to use them. Putting lighting in the right places will also help to ensure that it’s easy to be in your kitchen.

If you’re ready for a beautiful custom kitchen in your home, consider using the tips mentioned above to help you design the perfect space.


Filed Under: Home

3 Tips For Rearranging A Living Space For The Use A Walking Aid

September 10, 2024

If you or someone you know if using a walking aid for the first time, be it because they’re older now and living in an senior living community or because they’ve sustained an injury that has their body healing, there are a few things that you might want to help them do around the house to make moving around easier. Especially if their home isn’t really equipped for those who might have issues with accessibility, rearranging the living spaces can make life a whole lot easier.

To help you see how this can be done, here are three tips for rearranging a living space during that time that you’ll be using a walking aid.

Remove Unnecessary Items

One of the first things that you should do when you’re trying to create a safe space for someone to move around in when using a walking aid is to get rid of anything that doesn’t need to be in the space. With clutter and other unnecessary items filling up a room, it can be hard for anyone to move around the space, let alone someone who’s now having to maneuver a walking aid, too.

If there are actual larger items that you can move out of the space so that there’s more room to get around, this can work out great. But in addition to this, if there are larger pieces of furniture in the room, you may want to downsize so that the items that are left in the room allow for more space to move around as well.

Create More Space Between Furniture

For the furniture that is left in the living space, something that can make moving around the room easier to manage is if there is more space in between pieces of furniture and other items.

Ideally, for the use of things like a wheelchair, you’ll want to try to keep five-feet between spaces so that the wheelchair can easily fit through without knocking into things or encroaching on the space of the person using the wheelchair. While using things like a walker can usually require less space than five feet, having more space than you might traditionally between furniture can still make for an easier time getting around at home.

Bring Things Within Arm’s Reach

When someone is having to use a walking aid around the house, they aren’t going to be able to get around as well as they could before. This means that not only will they be moving more slowly and needing more space to move in general, but they also won’t be able to reach things that are up high or down low like they may have been able to before.

With this in mind, it’s wise to rearrange things so that they don’t have to reach farther than 24 to 48 inches to get anything that they’ll need.

If you or someone you love is having to use a walking aid at home, consider using the tips mentioned above to help you rearrange the space effectively.

Filed Under: Home

3 Tips For Prepping Your Air Conditioner For Summer

April 8, 2024

With summer coming in fast, it’s time to start thinking about what you’re going to do to keep your home cool during the hot summer months. If you have an air conditioner, this is probably going to be your first line of defense against those hot summer days when you simply can’t cool off. But if you haven’t prepared your air conditioner for use, you could find that it doesn’t work as it should the first time that you turn it on.

To help ensure that this doesn’t happen to you, here are three tips for prepping your air conditioner for the summer.

Get Your Unit Serviced Before You Want To Use It

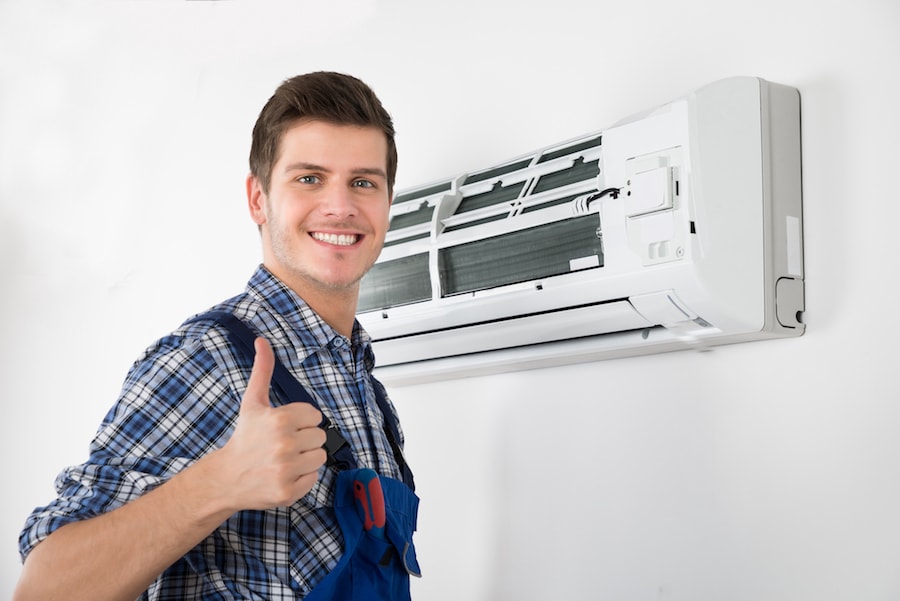
Prior to the time of the year when you plan on turning on your air conditioner for the first time, it’s wise to set up a professional to come take a look at your unit and service it in any necessary way. While you can take a look at things yourself, unless you actually know what you’re doing, this likely won’t prove to be very effective for you. But if you have someone with experience who can come and service your unit, you’ll be sure that it will work as it should when you first turn it on.

To make sure that you’re not left hanging when the weather starts to warm up, try to schedule your service well before you think you’ll want to use your air conditioner. This way, you won’t be competing with all of the other customers to have someone quickly come to their house before things start heating up too much.

Give It A Good Cleaning

While a professional air conditioner repair person will be able to come and take a look at your unit and how things are running, they likely won’t do much cleaning of the unit for you. Luckily, this is something that you can easily do on your own.

For the outside part of your air conditioning unit, you’ll want to vacuum the fins with a soft bristle brush attachment to get all of the dirt and debris off. This will help your unit to run much more efficiently.

Replace Your Filters

If your HVAC unit has been used in the winter months, you’ll want to make sure that you replace your filter before you start using it for summer, too. When the filter gets clogged, your unit will have to work a lot harder to push air through and get that air cool. But once the filter is replaced with a clean new one, your unit will be able to operate much better for you.

If you want to have your air conditioner ready for when the heat of summer comes your way, consider implementing some of the tips mentioned above to help you prepare your unit.


Filed Under: Home

The Step-by-Step Process of A Custom House Plans Business

August 10, 2023

Building a dream home is a life-defining milestone for many individuals and families. While numerous house plans are available in the market, opting for a custom-designed home offers the opportunity to bring your vision to life. This blog post will take you behind the scenes and explore the fascinating process of creating custom house plans. Discover the meticulous steps and collaboration in crafting a personalized sanctuary from the initial concept to the final blueprints.

Understanding Client Needs and Aspirations

Creating custom house plans begins with a client-centered approach. An architectural team like Monster House Plans takes the time to sit down with the clients to understand their specific needs, desires, and lifestyle requirements. They ask questions about the family size, daily routines, hobbies, and future plans to get a comprehensive picture of what the clients envision for their dream home. Through active listening and open communication, the architectural team gains insights into the clients’ preferences for architectural styles, interior design, and overall ambiance.

Site Analysis and Topography

Before the actual design process begins, the architectural team conducts a thorough site analysis. They visit the property to assess its topography, evaluate the views, study the surrounding landscape, and understand how natural elements such as sunlight and prevailing winds interact with the land. This site analysis is crucial in determining the best orientation for the house, identifying potential challenges, and optimizing the design to harmonize with the surroundings.

Conceptualizing the Design

Once armed with the client’s preferences and site analysis, the architectural team embarks on the creative process of conceptualizing the custom house design. Hand sketches, mood boards, and 3D renderings are used to visualize different design ideas and spatial configurations. These visual aids help the clients understand the proposed concepts better and provide valuable feedback, allowing for a collaborative approach to refining the initial design.

Incorporating Functionality and Flow

As the design takes shape, the architectural team strongly emphasizes functionality and traffic flow. They carefully plan the layout of rooms, ensuring that they are logically arranged for ease of movement and practical use. Special attention is given to spaces such as kitchens, bathrooms, and living areas, where efficient design can significantly enhance the overall comfort and convenience of the home.

Iterative Design Process

Custom house planning is an iterative process involving multiple rounds of feedback and revision. The architectural team collaborates closely with the clients, sharing updated designs and incorporating their input at each stage. This iterative approach allows for flexibility and ensures that the final design truly reflects the client’s vision and preferences.

Addressing Building Codes and Regulations

A crucial aspect of custom house planning is compliance with local building codes, zoning regulations, and permitting requirements. The architectural team works diligently to ensure that the design meets all legal requirements and obtains the necessary approvals. Adhering to these regulations not only ensures the safety and structural integrity of the house but also prevents potential delays or legal issues during the construction phase.

Fine-Tuning the Details

Attention to detail is paramount in custom house planning. The architectural team works meticulously to select appropriate building materials, finishes, and fixtures that align with the client’s aesthetic vision and functional needs. Details such as window placements, door types, ceiling heights, and lighting fixtures are carefully considered to enhance the overall design and ambiance of the space.

Creating Comprehensive Blueprints

Once the design is finalized, the architectural team creates comprehensive blueprints and construction documents. These detailed plans include architectural drawings, elevations, floor plans, electrical and plumbing layouts, and any other necessary specifications. These blueprints guide the construction team and ensure that the design is executed accurately and efficiently.

Collaboration with Construction Team

Architects maintain a collaborative relationship with the construction team throughout the construction phase. Regular site visits and coordination meetings ensure that the design intent is faithfully translated into the actual construction. The architects work closely with contractors to address any unforeseen challenges and make necessary adjustments while keeping the project on track and within the desired timeline.

Conclusion

Creating custom house plans is a multifaceted and dynamic process that revolves around understanding client needs, translating their vision into a tangible design, and collaborating with various stakeholders to bring the dream home to life. The combination of creativity, functionality, attention to detail, and effective communication ensures that the custom-designed home embodies the unique essence of its owners while providing them with a living space that perfectly suits their lifestyles and aspirations.


Filed Under: Home

Roofing Installation and Repair Basics: A Comprehensive Guide

May 15, 2023

C:\Users\manoaj\Downloads\1.png

Roofing installation involves the process of properly securing materials, like underlayment, shingles and flashing, to your home’s structure. Maintenance and repairs usually involve fixing problem areas such as worn-out parts, leaks, or other damages.

Common Roofing Materials

When it comes to roofing materials, there are a number of options available. Common roofing materials include asphalt shingle, metal, tile, and slate; each of these possesses different properties that can be beneficial for different uses. Asphalt shingle roofs are one of the most popular choices since they are relatively inexpensive, easy to install, and tend to last for 15-30 years depending on the quality. Metal roofs have also gained popularity in recent years due to their fire resistance, durability, and longevity of 50+ years. Tile and slate roofs offer unique aesthetics but require more maintenance than other types of materials due to their fragility and susceptibility to weather damage.

Depending on the climate or area of construction, some roof materials may be better suited than others. A professional roofing company can help a homeowner select the right roof material to secure a home and protect it from weather damage. For example, metal might be suitable in areas with high temperatures or wet climates due to its superior heat resistance and longevity compared to other materials like asphalt shingles. Alternatively, tile may be preferable in areas prone to wildfires as some styles offer greater protection against fire damage than metal roofs.

It is important to consider using a combination or layering of roofing materials when feasible in order to get the most benefits from each layer. This is because layered roofing systems can provide additional insulation and can ease the impact of extreme temperature changes or weather conditions.

No matter which roof material you decide upon, it is important to ensure that the contractors hired are experienced and reliable so that your roof is properly installed up-to-code, and built to withstand whatever nature throws at it. With that being said, examining the different types of roofing materials available is key to finding the right fit for your property.

Different Types of Roofing Materials

When it comes roofing materials, there is a wealth of options. Common roofing materials such as asphalt and metal remain popular choices; however, there are also more unique materials such as slate, ceramic, rubber and cedar shingles. It’s important to select the type of roofing material that meets your needs best.

Asphalt is one of the most widely used roofing materials and offers a variety of benefits. Asphalt is affordable, durable and capable of lasting for 20-30 years with minimal maintenance. On the other hand, metal roofing can be much more expensive up-front; though it requires less maintenance and can last 40-50 years or longer if properly cared for. Furthermore, metal roofing is available in numerous styles and colors that can match any home aesthetic.

Slate is another option that adds a refined touch to any home while providing long-term protection. Slate offers unbeatable durability but tends to be quite heavy and quite expensive due to its natural material form. Ceramic tiles provide a classic look to any home and offer great protection when properly applied — though they are often difficult to install correctly due to their irregular shape. Rubber shingles are lightweight, environmentally friendly and cost-effective; however, they aren’t as durable or visually appealing as other conventional materials. And finally, cedar shingles present an attractive look while also providing good insulation; they are relatively easy to install but need more frequent cleaning/maintenance than other types of shingles.

Overall, when choosing a type of material for your roof installation or repair project it comes down to your budget and expectations for the appearance and performance of the material. Every type of roof material has its own unique set of benefits that should be weighed against your personal preferences before making a decision on which will provide the best value for your situation.

Now that you have gone through the various types of roofing materials available, it’s equally important to understand how to maintain them over time. Cleanings, inspections, and repairs must be undertaken regularly in order to ensure safe conditions on your roof over time — the next section dives into this realm in greater detail size on these topics in order to maximize the value you get from your new or existing roof system.

Maintenance and Care of Roof Materials

When it comes to maintaining and caring for the various types of roofing material, it is essential for homeowners and business owners alike to be aware that each type requires different upkeep. For instance, asphalt shingle roofs will require the removal of debris, regular inspection to check for missing or broken shingles, and must be replaced every 10-15 years. On the other hand, metal roofs may last up to 50 years with proper maintenance, as they are more durable due to their resistance to impact damage, UV ray damage, fire retardancy, and water resistance. However, some may argue that metal roofs are not aesthetically pleasing compared to the likes of asphalt shingle roofs. Nevertheless, metal roofs come in a variety of colors and shapes that can match any aesthetic taste while providing durability and protection from extreme weather conditions.

Whether a roof is made of metal or asphalt shingles, it is important for homeowners and business owners alike to know the needs of their roofing material in terms of maintenance and care, as properly maintained roofs can last for decades. Although all roofing materials require consistent cleaning and preventative maintenance such as inspection for signs of damage or wear and tear to maximize its lifespan potential – a necessary step when investing in a long-term asset such as a roof – following the manufacturer’s guidelines will ensure proper maintenance so that your investment will be protected for many years. As we move on from this section let us now investigate even further into how to get the most out of your investments by discussing important steps for roof installation and repair.

Experienced Professionals are a Must

Experience is necessary when performing any major roof installation or repair job, but it comes with a higher cost. Minor repairs can often be done with a DIY approach if proper safety precautions are taken and warranties are maintained. Vigilance in terms of understanding potential risks and establishing safe working conditions should also be taken into account before beginning work on elevated surfaces.

Common Roof Repairs and Maintenance Projects

Roof repairs and maintenance projects must be addressed immediately, as even a minor issue can become very costly if left unresolved. Common roof repairs include sealing leaks, replacing missing or damaged shingles, and repairing metal flashings around chimneys, vents, and skylights. In addition to these repairs, it is also important to inspect the roof regularly for any wear or deterioration in order to prevent more serious – and costlier – issues down the road.

The degree of difficulty for roof repairs largely depends on roof type, roof degree of pitch, and height of the structure. A number of factors come into play when it comes to deciding the best course of action. Homeowners should take precautionary measures before undertaking any repair job on their own; safety risks are especially high when dealing with heights and different types of materials.

On the other hand, hiring a professional crew comes with its own considerations as well. Unqualified crews can cause irreparable damage which may require replacement instead of repair while licensed professionals often come equipped with specialized tools and advanced knowledge not available to non-professionals. The decision should be weighed carefully depending on the scope of the project and the availability of resources at hand.

Whichever route you take, staying proactive about your home’s general upkeep will help ensure long-term longevity in both quality and performance; it is always better to address problems before they turn into bigger issues. As such, upkeep costs are easily justifiable when taking into consideration future repair costs that could be incurred from neglecting proper maintenance practices today. Understanding the cost associated with roof installation and repair will provide further insight as to why maintenance plays an integral role for successful long-term roofing care.

Cost of Roof Installation and Repairs

When it comes to budgeting for roof installation and repairs, the cost of the project can vary greatly. Many factors including the type of repair, size of the project, material costs, tools needed, labor costs, and local labor rates all need to be taken into consideration.

On average, major roof repairs will typically cost between $550 and $1,000. But if a new roof installation is necessary due to old age or damage, homeowners may find that shelled out anywhere between $6,000 and $25,000. Of course, this range could increase if a specialized roofing system is required or the homeowner chooses to use more expensive materials like stone tiles or metal sheets.

Some argue that while there may be an initial cost involved in having your roof replaced or repaired by professional contractors, this price cannot compare to the financial burden you may endure if a problem arises from doing the job yourself. Often times a DIY repair done incorrectly can lead to more costly problems down the line such as leaking roofs or shoddy framing. To support this argument, studies conducted by industry professionals reveal that 41 percent of those who attempted a home improvement project without professional help had to enlist help in the end. On top of that, cost savings for DIY projects are often overestimated according to research from Gallup® and HomeAdvisorTM because most homeowners fail to account for overhead expenses associated with supplies and tools needed for significant renovations.

The largest factor however when it comes to average roof installation/repair costs is labor. According to Slate Magazine report from 2019, on average labor can take up 50-75% of any roof install/repair project depending on geographic location and other market factors. This means occupational safety regulations enforced by each state should also be taken into consideration when making budget estimates as they have legal authority in relation to minimum wage levels and worker compensation needs which can greatly affect the overall cost of a renovation project.


Filed Under: Home

Hardscaping: The Ultimate Upgrade for Your Property

April 17, 2023

As a homeowner, you take pride in your property and want it to look its best. Hardscaping can be the perfect solution if you’re looking to enhance the appearance of your outdoor space or increase its functionality. Hardscaping refers to using hard, durable materials such as concrete, stone, wood, and metal to create permanent structures that define outdoor living spaces. Here are some of the reasons why hardscaping has become such a popular trend among homeowners:

Why People Hardscape

Hardscaping is a popular landscaping trend for several reasons. One of the biggest benefits is that it can add both beauty and functionality to your outdoor living spaces. By creating hardscaped areas for cooking, dining, and entertaining, you can make your outdoor space more usable and enjoyable year-round. In addition, hardscaping can reduce the need for ongoing maintenance and make your property more attractive to potential buyers if you decide to sell.

How Can It Upgrade My Property?

Hardscaping can upgrade your property in several ways. For example, a hardscaped patio can provide a defined outdoor dining and entertaining space, while a retaining wall can add visual interest and help prevent erosion. Hardscaping can also create a low-maintenance alternative to traditional lawns or planting beds, reducing the need for ongoing maintenance and making your property more eco-friendly. Adding hardscaping features to your property can increase its overall value and make it more attractive to potential buyers.

What Can I Install?

The possibilities for hardscaping are virtually endless. Some popular hardscaping features include:

Patios: A hardscape patio can provide a defined space for outdoor dining and entertaining.

Walkways: Hardscaped walkways can add visual interest to your property while providing a safe and durable surface for foot traffic.

Retaining walls: Retaining walls can add visual interest and help prevent erosion on sloped properties.

Fire pits: A hardscaped fire pit can provide a cozy gathering spot for family and friends on chilly evenings.

Outdoor kitchens: A hardscaped outdoor kitchen can provide a functional and stylish space for cooking and entertaining.

Water features: Hardscaped features like fountains and ponds can add visual interest and create a soothing atmosphere in your outdoor space.

Popular Installation Companies

If you’re interested in hardscaping your property, there are many companies that specialize in

hardscaping design and installation. Some of the most popular hardscaping companies include:

Evergreen: They are a Delaware hardscape who works to make sure your building project is completed on schedule and within your allocated budget. You can count on receiving nothing less than courteous service, the best work possible, as promised, and on time from the very first handshake. Our objective is to provide a high-quality service and artisan installation, paying close attention to every last detail.

Unilock: Unilock is another popular hardscaping company that specializes in the design and installation of high-quality hardscaping products such as pavers, retaining walls, and outdoor kitchens.

EP Henry: EP Henry is a hardscaping company that offers a wide range of products and services, including pavers, retaining walls, and outdoor fireplaces.

Techo-Bloc: Techo-Bloc is a hardscaping company that offers a wide range of products and services, including pavers, retaining walls, and outdoor kitchens.

Conclusion

Hardscaping can be the perfect solution for homeowners looking to upgrade their outdoor living spaces. By adding hardscaping features such as patios, walkways, retaining walls, fire pits, outdoor kitchens, and water features, you can enhance the beauty and functionality of your property while reducing the need for ongoing maintenance.

Filed Under: Home

Choosing the Right Floor Cleaning Machine: A Guide for Your Needs

April 17, 2023

We’ve all been there – you look at the selection of floor cleaning machines on offer and it all feels so overwhelming! Do you get the battery-powered one for quick, easy cleaning? The big one that does both carpets and hard floors? Or opt for the one with the extra long attachment and really get in around those tight corners? Even if you’re sure that you could never be so indecisive when it comes to any other household appliance, when presented with the variety of floor cleaning machines, it’s like coming face to face with the most indecision-inducing riddle of all.

Well, if those decisions feel too hard to make, you can take solace in the fact that you don’t have to do it alone. Here we understand the seemingly endless options of floor cleaning machines and the anxieties that come along with choosing the right one. That is why, today, we are here to offer you a comprehensive guide on selecting a floor cleaning machine suited perfectly to meet your needs! So sit back, relax, and read on – You’re sure to have arrived at a well-informed decision by the end of this post!

Quick Summary of Key Question

The best floor cleaning machine for your needs will depend on the type of flooring you have, the size of the area to be cleaned, and the intensity of cleaning needed. Research different models to find the right fit for you and your home.

Analyzing Your Floor Care Needs

When it comes to choosing the right floor cleaning machine, analyzing your floor care needs is a crucial and necessary step. Different types of floors require different types of care for proper and long lasting maintenance. For example, if you have hardwood or linoleum floors in your home, you will likely require a gentler cleaning machine that can be used to buff or scrub the surface. Tiles typically need something more heavy duty with suction capabilities. Carpets would also require a different kind of machine due to the depth of their fibers. Additionally, assessing which areas in your home will require more intensive care is important for understanding which type of cleaner and machine you should use. Areas around doorways, back corners, and kitchen floors may need something more specialised than areas in hallways and living rooms that receive less usage.

Even if you have the same type of floor throughout your home, there are differences in material quality that could call for a particular cleaning method or machine attachment to achieve the best results. Therefore, thoroughly evaluating all areas in your home before selecting a floor cleaning machine can save time and resources later on. Taking note of existing dirt, levels of traffic in certain areas and any other possible variables can help create an optimal plan for keeping your floors clean.

Now that we’ve discussed how essential it is to understand your floor care needs before selecting the appropriate floor cleaning machine, let’s move onto looking at the various types of floors within your home.

  • According to a survey conducted in 2019, the most popular and widely used type of floor cleaning machine is a carpet cleaner/extractor, followed by floor scrubbers.
  • A study conducted in 2019 found that 89% of consumers prefer to use hard surface floor cleaners for routine home maintenance.
  • In 2020, the highest rated type of floor cleaning machine according to Consumer Reports was an upright vacuum cleaner.

Types of Floors in Your Home

Now that you have analyzed the floors in your home and assessed the type of care needed, it is important to know what type of floors you are dealing with. For example, hardwood is one of the oldest flooring types, which has experienced a surge in popularity due to its relatively low cost and versatility. With hardwood, proper maintenance is key to keeping it looking presentable. Hard surfaces should be cleaned regularly using a special cleaner designed for this purpose. Similarly, carpets need attention such as vacuuming and periodic deep-cleaning. As carpets naturally absorb dirt, it is important to stay on top of carpet cleaning to keep allergens at bay and maintain their like-new appearance.

Tile is another popular flooring option nowadays. Because tiles come in so many sizes, shapes and colors, they can be highly customizable to any room. Astile usually requires more elaborate maintenance than other surfaces, regular mopping is essential for removing excess dirt and bacteria from its grout lines. Additionally, sealing your tile periodically may help prevent further staining and defensive wear over time.

No matter what the surface may be—hardwood, carpet or tile —it’s imperative to find the right cleaners that fit your specific needs while not harming your floors or health in the long run. Taking all these factors into account before making a decision when considering different types of floor cleaning machines can make all the difference in keeping your home in tip-top shape! Paying careful attention when selecting a machine that caters to your particular floor type will ensure that you get maximum results with minimal effort invested. The next section will dive into the particulars of choosing the right floor cleaning machine.

Different Types of Floor Cleaning Machines

It is important to match the type of floor cleaning machine you choose to the needs of your home. Different types of floor cleaning machines each come with their own unique advantages and drawbacks depending on the floor type they are intended to clean. The most common type of floor cleaning machine are steam mops, as these machines have become increasingly popular due to their lightweight design, portability and steady yet effective performance on sealed wood or laminate floors. Steam mops eliminate the need for expensive detergents or cleaning solutions as they typically rely solely on heat and water which offers major time, effort and cost savings. On the other hand, however, some people might find that steam mops aren’t always as effective on deeper, dirtier stains like those found in bathrooms or commercial kitchens.

Rotary scrubbing machines, such as a cylinder cleaner equipped with a powerful scrub brush and built-in vacuum system for sucking up dirt and debris in one pass, are ideal for larger floors areas including commercial spaces such as retail stores, restaurants and car dealerships. These machines provide a complete floor care solution that includes vacuuming, scrubbing and drying all in one. Although typically more costly than a steam mop, rotary scrubbing machines offer greater coverage which can significantly reduce overall labor costs over time.

Knowing what type of floor cleaning machine you need for your particular floors can save you both time and ensure great results – transitioning nicely to our next section discussing different vacuums that work best on carpets.

Vacuums for Carpets

When it comes to vacuums for carpets, there are plenty of options to choose from. Options range from manual uprights and canisters to electric brooms and wet-dry vacs. Unless you plan on using the vacuum for multiple purposes, manual models are usually sufficient for routine home carpet cleaning.

On the other hand, if you’re looking for a machine that can pick up debris on a variety of surfaces and is easy to maneuver around furniture, consider an electric broom. These machines tend to be lightweight and compact, meaning they’re easy to store away during periods of non-use. Additionally, they have more powerful suction than manual vacuums and can cover more area in less time.

Finally, if you need something with more power or plan on tackling tough messes, wet/dry vacuums are the way to go. These models feature strong motors, durable parts, and large collection tanks which make them adept at removing dirt and stains from flooring materials like carpets, tiles and hardwood.

No matter which type of vacuum you choose for your carpeted spaces, remember that proper maintenance is key in ensuring consistent performance over time. With regular servicing, your chosen machine should last many years while helping keep your carpet looking spick-and-span.

As important as routine cleaning is for carpets, it’s also essential when maintaining area rugs or upholstered furniture – tasks which require their own specialized tools. To find out which machines we recommend for these applications, be sure to read our upcoming section about rug or area vacuums.

Most Important Points

When it comes to vacuums for carpets, there are many options available. Manual models are usually sufficient for routine cleaning jobs and electric brooms can pick up debris on a variety of surfaces and are easy to store away when not in use. Wet/dry vacs are the most powerful and suitable for removing dirt and stains from flooring materials. Regular maintenance of your chosen vacuum is necessary to ensure consistent performance over time. Specialized tools may be needed for area rugs or upholstered furniture, so read our upcoming section to find out recommended machines.

Rug or Area Vacuums

Once you have the proper vacuum for your carpets, it is time to move on to considering a Rug or Area Vacuum. This type of unit might be more necessary than initially thought as they are designed to specialize in cleaning rugs and upholstered surfaces such as couches and chairs. Certain vacuums that have brushes designed for this purpose can remove pet hair, dust, and dirt that carpets can’t capture. For those with allergies, rugs are often notorious for retaining particles. If this is the case, the individual may want to opt for a vacuum specifically made for rugs and upholstery as the unit could provide deeper cleaning compared to other types.

On the other hand, some argue that one should invest in an all-in-one unit instead of a specialized rug vacuum, as it will cover all your needs. Depending on the size of the area being cleaned and the type of dirt being picked up, an all-in-one vacuum may be sufficient enough, saving money and providing extra convenience when switching between surface types. Ultimately, one must weigh their own priorities when it comes to deciding which type of vacuum best fits their needs.

Whether you decide on a specialized rug vacuum or an all-in-one unit, it can be useful to look into your options when it comes to cleaning hard surfaces. Carpet vacuums and rug vacuums alike have their uses in different contexts so understanding and being able to market yourself with knowledge on each type is important especially if you are looking into a career in floor care maintenance.

As we move forward it is important to understand the applications of a Hard Surface Vacuum and what sets it apart from the other types.

Hard Surface Vacuums

After discussing rug or area vacuums as a potential cleaning tool, it is now necessary to consider hard surface vacuums. Hard surface vacuums are efficient machines that can quickly and effectively pick up dirt particles, dust, and debris from hard surfaces such as wood or tile floors. Unlike traditional carpet cleaners or polishers, these vacuums generally have more power and suction that allow for the removal of tougher residues and clumps of material.

On one hand, there are some advantages of using hard surface vacuum cleaners. These machines come with specialized attachments that make it easier to clean in tight spaces and corners. Additionally, most of these models come with adjustable speeds for different types of dirt: heavy-duty vacuums have more power for tougher jobs and lighter-duty vacuums are better suited for daily maintenance work.

On the other hand, there are also some drawbacks to using hard surface vacuum cleaners. For example, if a vacuum is too powerful, it may damage delicate surfaces like linoleum or vinyl tiles. Furthermore, because most of these types of vacuums require manual operation instead of being battery operated or attached to a power cord, they run the risk of needing repair and regular maintenance problems that could be costly in the long run.

Therefore, when it comes to selecting a hard surface vacuum cleaner, it is important to take into account both the positives and negatives of this type of machine before making a final decision. After determining the right solution for your home or office cleaning needs, it is time to investigate possible costs associated with purchasing cleaning machines – an important step in choosing the best new cleaner.

Analyzing Costs of Different Machines

When deciding between different floor cleaning machines, it’s important to factor in the cost. Both hard surface vacuums and traditional mopping machines can have a hefty price tag, depending on their size, performance, and attachments. Consider which machine is right for your needs and budget before making an investment.

For instance, if you are cleaning a small area with light messes, then a simple handheld vacuum may be more appropriate and less costly than a full-sized upright vacuum. On the other hand, if you have a large space with high traffic and plenty of spills and messes, then a commercial-grade machine that can suck up dirt, liquid, dust mites, and allergens might be necessary. This type of machine typically comes at a much higher cost than basic vacuums or mops, but in some cases could save you money in the long run due to its quick and thorough clean quality.

Overall, numerous factors play into how much money you should spend on a cleaning machine. Consider how often you will be using it; how much space you need to clean; what type of materials are on your floors; and if additional attachments or features might come in handy. Research machines thoroughly to make sure they fit your needs while being mindful of the cost associated with each model.

Purchasing the right floor cleaning machine can seem like an overwhelming decision because there are so many options available. By analyzing all costs involved—including the initial purchase price as well as overall maintenance—you can determine which machine is right for your needs while also staying within your budget. Understanding the necessary balance between price versus function will help guide you to choosing the right floor cleaning machine for your needs.

Once you have assessed different models based on their costs and features, it’s time to look into other considerations that could impact your purchase decision such as ease of use, power level capabilities, warranties, accessories included with each model, as well as repairs and ongoing maintenance services offered by each company. All of these factors should be taken into account before selecting the perfect floor cleaning machine for you.

Considerations When Choosing the Right Machine

When choosing the right floor cleaning machine, there are numerous considerations to take into account. First, it is important to consider the size and layout of the space that needs to be cleaned. Machines with larger tanks cover more surface area in less time; however, this also means they are bulkier and more complicated to maneuver. Therefore, if the room or area being cleaned has tight spaces or lots of furniture, it may be best to opt for a smaller machine with better maneuverability without sacrificing power.

Another factor to consider when selecting a machine is its functionality. Is this machine intended for everyday usage or occasional use? The answer will inform your choice of motor size and type – from small five amp motors to large commercial grade twenty amp motors – as well as water pressure, scrubbing power, suction power and recovery tank capacity. A high-grade commercial machine typically provides a deeper clean, greater efficiency and longer service life than mid-grade models designed for home use or light commercial settings.

It is also crucial to consider safety features when picking your floor cleaning machine. Consider opting for a model that has safety items such as automatic shut offs, spill trays around tanks and recovery buckets, and splash guards on brushes to prevent splashing upspray onto walls and other surfaces. Additionally, many modern machines come equipped with adjustable traction control systems which help regulate floor speeds automatically depending on the texture of the flooring surface as well as sound dampening technologies that can reduce sound levels significantly while still providing effective cleaning power.

Ultimately, selecting the right floor cleaning machine should involve balancing out various factors including size and layout of the space being cleaned, intended usage frequency, motor power and safety features. Doing research ahead of time and trying out several models before making a purchase could be beneficial in finding the most suitable model for your needs.

Common Questions and Responses

Are there any floor cleaning machines that are better suited for certain types of floors?

Yes, there are certain floor cleaning machines that are better suited for certain types of floors. For example, hardwood floors would benefit from a floor cleaning machine that uses a microfiber dust mop and carpet may require a more powerful steam cleaner to really deep clean between fibers. Tile and linoleum can typically be swept or vacuumed with a multi-surface option and there are even special machines made specifically for grout. When shopping for the right floor cleaning machine it is important to consider both your budget with brand quality and what type of flooring you need it to work best on.

What are the pros and cons of different types of floor cleaning machines?

When it comes to choosing the right floor cleaning machine, there are a few different types available, each with their own set of pros and cons.

Corded Upright Vacuum Cleaners are usually cheaper than other types, however they are more prone to tangling and require regular maintenance such as filter and belt replacement. They provide deep cleaning power and can reach behind and under furniture since they need not be moved around while in use.

Cordless Stick Vacuum Cleaners are less powerful than a corded upright cleaner but offer more flexibility since they do not need to be plugged into an outlet. This makes them perfect for smaller living spaces or areas that are hard to reach with a corded vacuum. On the downside, their battery life tends to be limited and if you have large areas of carpet that need cleaning, this may not be the best choice for you.

Robotic Vacuum Cleaners are increasingly popular for those that prefer set-it-and-forget it solutions. While these machines do excel at picking up dirt and debris from your floors, they often struggle with corners and edges as well as thick carpets due to their relatively weak suction power. On the plus side though, they can handle multiple floors easily, making them ideal for multi-level homes.

Steam Mops are great alternatives if you want something that will give your floors a shiny finish without the hassle of using harsh chemicals or waiting too long for it to dry. However, one downfall is that steam mops tend to be on the pricier side compared to other options, so if you’re looking for something to meet a tight budget then this might not be your best bet.

Ultimately, when it comes to choosing the right floor cleaning machine for your needs it will depend on what type of floor surface you have as well as other factors like budget and level of convenience desired. Consider all the pros and cons before making a purchase so you can make an educated decision that works best for you!

What factors should I consider when choosing a floor cleaning machine?

When choosing a floor cleaning machine, there are a few key factors to consider. First and foremost, you should consider the type of flooring in your home – if you have carpets or hardwood floors, you’ll need a machine that is designed for that particular type of flooring. You should also consider the size of the area you’re cleaning – some machines are better suited for larger areas while others are designed specifically for small spaces. In addition, budget is also an important factor – some machines can be quite pricey, so make sure to do your research and decide what you feel comfortable spending. Finally, check out reviews online to find out which machines have had positive customer experiences – this will help you get the best bang for your buck.


Filed Under: Home

3 Uses of Wood in Interior Design Besides Flooring

March 30, 2023

Wood is a natural material that has been used for various purposes for thousands of years, and for good reason. Wood is a strong durable material that can easily be shaped, cut, and carved into various forms, a good insulator, and a renewable resource, with a beautiful warm aesthetic that can enhance the look and feel of any space. Naturally, this makes wood one of the best choices for interior design, and not just for flooring options.

So if you’re in need of ideas before you call your wood supplier, here are 3 uses of wood in interior design besides flooring.

Wall Paneling

Suitable for both traditional and modern decor styles, wall paneling involves covering your walls with decorative materials, including wood (pine, cedar, oak, cherry), with a technique that can add texture, depth, and personality to any room.

You have a number of design options with wall paneling like tongue-and-groove, shiplap, board-and-batten, and beadboard so you can easily find something to fit your room’s aesthetic and design preferences. You want to consider where you want wood paneling carefully. Some popular areas include accent walls, fireplace surrounds, or even entire rooms.

Then, you’ll have to decide whether to leave it natural or add a finish to protect the wood from scratches and stains. If you choose the latter your options include staining, painting, or sealing with a clear coat.

Cabinetry

Cabinets are not just very useful, they can also be visually appealing and a deliberate part of interior design. Wooden cabinetry can add warmth and character to a room, and there are many different types of wood to choose from, each with its unique color and grain pattern.

You can mix and match different types of wood. For example, you could have dark cherry cabinets on your island and lighter oak cabinets on your perimeter walls. Or, adding hardware to your wood cabinetry (rustic, iron pulls, or sleek, modern handles) can mean an interesting finished look overall.

Consider incorporating lighting as well, such as installing under-cabinet lighting or adding a pendant light above your island to draw attention to the cabinets.

Then, a natural, matte finish can give your cabinetry a more rustic feel, while a high-gloss finish can give it a more modern, sophisticated look.

Ceiling Beams

Exposed wooden beams in your ceiling can add architectural interest to a space and give it a warm rustic look if that’s your style. Or, they can also be styled to look industrial. For example, hardwoods such as oak, maple, and teak have a classic look while softwoods like cedar and pine are lightweight and have a more rustic feel.

There are several placement options such as having them installed parallel to each other or in a crosshatch pattern. You can even have them installed in a diagonal pattern for a more unique look to the ceiling.

Then, a clear finish will help bring out the natural beauty of the wood, or you can stain them a contrasting color for a more dramatic look.

Incorporating wood into your interior design doesn’t have to be difficult. Start with wood paneling, cabinetry, and ceiling beams.


Filed Under: Home

3 Tips For Picking A Coffee Table For Your Family Home

March 14, 2023

Something that many people feel that they can’t go without in their living room or family room is a coffee table. However, when you have kids, you’ll need to be very careful with the coffee tables that you choose to include in your home, as they can have a big impact on your life and the lives of your children.

To help ensure that you make the right design choice here, here are three tips for picking a coffee table for your family home.

Avoid Sharp Edges

One of the most important things about a family home is keeping everyone in your home safe. For this reason, if you have little kids, it’s best to avoid getting a coffee table that has sharp edges.

Kids are known for running around haphazardly, which can leave them to easily run into furniture and other items around your house. And when one of the items that’s right down at their level is a sharp-edged coffee table, this can be particularly dangerous for them. Knowing this, it’s best to try to get a coffee table that has more rounded edges so that, even if your young kids do run around or into the coffee table, they have less of a chance of getting hurt.

Choose The Right Materials

The materials that your coffee table is made of is also a very important decision to make.

From a safety standpoint, families are best to avoid coffee tables that have glass on top, as kids have been known to break these and then be in very dangerous situations. Additionally, you’ll also want to choose a coffee table that is going to be built sturdy, not easy get knocked over, and be easy for you to clean. Some materials that you should look for include things like dark wood that will easily hide stains, or even a stone, metal, or acrylic coffee table that you can easily wipe down then needed.

Get The Height Right

The height for your coffee is also something that you’ll need to consider carefully when putting a coffee table in a room where young kids will frequent.

Depending on the ages and temperaments of your kids, you may want to get one that has a relatively low profile so that your kids can’t hit their heads on it while learning to walk. However, if you have kids that like to climb, getting a taller coffee table may discourage them from this. As a good rule of thumb though, matching the height of your coffee table to the height of your couch cushions is advised.

If you’re looking to get a new coffee table for your family home, consider using the tips mentioned above to help you make this decision.


Filed Under: Home

3 Tips For Managing Materials When Doing Home Renovations Projects

January 16, 2023

If you have a long list of home renovations projects that you’re wanting to take on, then you also likely have a long list of the materials that you’ll be needing to actually get these projects done. But if you don’t have a lot of experience with working with and managing these types of materials, you might find yourself struggling to get what you need and keep it in a place where you can easily access it when necessary. Luckily, there are a few tricks that can help you with this part of your projects.

To help you see just what these things are, here are three tips for managing materials when doing home renovation projects.

Prepare With Proper Storage

Before you even start ordering any of the materials that you’ll need, the first thing you want to think about is where you’re going to put everything when you get it. And, along these same lines, if you’re going to be putting your materials right at the renovation site, you’ll likely have to move other items out of that space so there’s room. And in this case, you’ll have to find space for these moved items as well.

To not feel like you’re constantly having to move things out of your way to get your home renovation projects going, you may want to consider renting a storage container throughout the duration of your project. This way, you can use this space to hold the materials you aren’t quite ready to use yet or your personal items that you want out of the way.

Get Your Orders Right

Once you have a space ready to put your materials once you get them, it’s time to start ordering what you need.

If you’re not familiar with this process, you’ll want to double and triple check your orders before placing them. Making sure you’ve chosen the right quantity, that you’re getting it at the right price, and that your orders will come on time are all vital aspects to a successful construction project.

Find Help With The Big Stuff

For some projects, the materials that you’ll be using will be too big and heavy for you to manage on your own. When this happens, you’ll want to be sure that you’ve called in the help that you need for loading and unloading the products or materials.

In some cases, you might be able to just ask a friend or family member to give you a hand. But with other things, you may need to have professionals there to take care of things that you simply don’t have the skills or abilities to do on your own.

If you have some projects coming up that will require you to have a lot of materials on-hand, consider using the tips mentioned above to help you manage everything.


Filed Under: Home

  • Page 1
  • Page 2
  • Page 3
  • Interim pages omitted …
  • Page 7
  • Go to Next Page »

Primary Sidebar

About

Hi and welcome! I’m Lenny, and this blog space is my Internet home. I write, I cook, and I design. I love to take pictures of all things food and home décor.

Recent Posts

  • 3 Signs Assisted Living Is Right For Your Older Parent
  • E-commerce Store Budget: 3 Tips for Beginners
  • 3 Tips For Setting Boundaries With Your Adult Children
  • 4 Biggest Mistakes People Make When Buying Property
  • 3 Tips For Designing A Beautiful Custom Kitchen

Let’s Connect

  • Facebook
  • LinkedIn
  • Twitter

Facebook

Skipping Stones Design

Latest

3 Signs Assisted Living Is Right For Your Older Parent

E-commerce Store Budget: 3 Tips for Beginners

3 Tips For Setting Boundaries With Your Adult Children

Footer

About

Hi and welcome! I’m Lenny, and this blog space is my Internet home. I write, I cook, and I design. I love to take pictures of all things food and home décor.

LatestPost

  • 3 Signs Assisted Living Is Right For Your Older Parent
  • E-commerce Store Budget: 3 Tips for Beginners
  • 3 Tips For Setting Boundaries With Your Adult Children
  • 4 Biggest Mistakes People Make When Buying Property
  • 3 Tips For Designing A Beautiful Custom Kitchen

Let’s Connect

  • Facebook
  • LinkedIn
  • Twitter

Copyright© 2025 · Dear Theme by Shay Bocks