• Skip to main content
  • Skip to primary sidebar
  • Skip to footer

Skipping Stone Design

Skipping Stone Design

  • Home
  • About
  • Health
  • Lifestyle
  • Tips
  • Budget
  • Travel
  • Contact

Lenny

10 Project Management Guidelines to Ensure Your Project is a Success

June 15, 2020

If you want to have a successful project, you must first appreciate the importance of having a good management strategy. However, according to the Project Management Institute, only 58% of organizations fully know the value of project management.

Managing a project can be very challenging, especially if it is your first time. With the right project management guidelines, you can get the help you need for your project.

Here are some project management tips that you can implement to help you in managing successful projects:

1. Outline the Scope

The first step in project management is defining its scope. You need to know what you are supposed to accomplish and the objective of the project. You should clarify the scope so that you understand it and confirm if it is needed.

Knowing precisely what the project calls for will help you stay on track throughout. You will also have an easy time explaining the project to your team once you can clearly understand it.

2. Define the Resources Needed

To achieve your objective, you will have to use some tools, equipment, and workforce. Every project manager might not have direct control of the resources that the project needs, but you have to define them.

Get to know how many people you need, the equipment you need, and where you will get them from. Technology has also made project management a little easier with management software like Microsoft project alternative for Mac that will help you organize and manage the project effectively.

3. Have a Clear Timeline

To stay on track, you should know when the project should be completed. Several projects have fixed deadlines. This means, as you work out your plan, you must decide how to use the time available well to meet the schedule.

Use the timeline to define the milestones, and do not forget to factor in the risks and any other limitations that you might have in your budget.

4. Define the Work

You need to define the components that you have to create to complete the project. For example, if you are organizing the launch of a product or service, you have to get a reception, food or drinks, entertainment, and the invites.

You will need to have people in charge of each component, and your team should also be aware of what is expected of them. They should understand the options available, cost limitations, and flexibility of the component that they are working on.

As the person in charge, you should list down every step that your team should take, depending on the project’s complexity and the size.

5. Have a Plan

Get all your ideas, steps, and everything that the projects need, and use that information to develop a plan. Identify the path that you should take from the start of the project to the end. Get to know what needs to be done at first, the resources needed and the timeline.

Please take advantage of the project management software and use it to automate such details. Share your plan with other stakeholders and make any adjustments to the plan so that you can have the final or baseline plan.

Remember, you can never have enough money or time assigned to a project. You have to make do with the resources that you have. However, if the goals set are unrealistic, you should ensure that you negotiate for better terms at the beginning so that you can have a successful project. Do not wait until you get into trouble to ask for more time or money.

6. Put Your Team Together

Your team should consist of experts in the various fields of the project. It would be best if you had a very strong and capable team that can work with little or no supervision. This way, you will have an easy time monitoring their progress.

The team you have should also be flexible enough and ready to make any adjustments necessary. Remember to clearly define their responsibilities and try to assign each member of your team a task that aligns with their skills and talents.

7. Keep Good Records

Write down everything about the project, including the plan you are working with, the roles of each member of your team, budget, resources, and any changes that you make. It is impossible to remember everything. It would be best if you wrote them down so that you can have a report at the end of the project.

8. Have Clear Lines of Communication

It would help if you kept the project stakeholders informed on the progress whenever you complete a milestone. To do this, you should also engage and listen to the members of your team.

Projects fail because of a lack of proper communication. If you make any changes, you should ensure that your entire team is aware of the change and have also adjusted as per the changes.

Good project management includes learning more about the team that is essential for the success of the project. To do this, you have to communicate.

9. Risk Management

Have a risk officer whose sole responsibility is to detect any potential problem. You need to assign this role to a very skeptical person. Your team members should report all their concerns and challenges and track all the issues raised so that you can offer a resolution.

Assessing risks, however, should not be your main priority. Do not waste a lot of time tracking every risk, especially if it does not pose a real threat to your project. Your risk management plan should be a healthy one.

10. Evaluate the Project

To assess the overall performance of the project, you need to evaluate it when it is complete. Doing this will help you and your team learn from the success of the project and what you would have done differently to implement it in the next project.

Follow These Project Management Guidelines for a Successful Project

To have a well-planned and well-executed project, you need the best project management guidelines. These steps will help you ensure that you have a successful project and a happy team.

For more interesting topics, check out our other articles.

Filed Under: Lifestyle

Reaching New Heights: 6 Unique Loft Design Ideas

June 12, 2020

Lofts are valuable square footage, and in small homes, you don’t want to waste an inch. In addition to making your home more spacious, a loft conversion can also add 20% to your home value.

With the right loft decoration, your space can be both functional and on-trend. Make the most of your space with these creative loft design ideas.

1. The Library Loft

An odd-shaped loft room, with shorter ceilings around the side, is the ideal place for books. DIY bookshelves are cost-effective and would fit well into the dormer area.

Throw in some comfortable cushions, throw blankets, and your loft will be a cozy, quiet space for reading and lounging.

2. The Ultimate Storage Loft Design Ideas

If you’re low on storage space, the loft is the perfect place to organize your extra things. But, a dingy old attic with no real floor or storage organization units isn’t going to make you feel good about your space.

Get some help with loft boarding, so you have a visually appealing and safe floor. Then add some custom, DIY shelves and cubes for organizational purposes. Your attic storage space will go from drab to fab.

3. Cozy Loft Bedroom

When it comes to a loft bedroom, it’s best to stick to minimalism. A bed, a small side table, and some string lights for a romantic and cozy vibe are all you need.

Splurge on luxurious bedding, like velvet throw pillows and a gorgeous quilt for some extra style.

If you’re concerned about the cost of a loft conversion, statistics have shown that an attic bedroom will return at least 53% of your investment.

4. Kids Playroom Loft

What’s more magical for children than playing in a cozy, hidden loft? Lofts are the perfect place for forts, reading in nooks, and playing make believe. Plus, tiny humans aren’t going to hit their heads on a low ceiling.

The first thing you want to do when converting your loft into a play space is to create a bright space. A dingy, dark looking attic is not going to be appealing. Paint the ceiling white, and add some additional lighting if needed.

If you need loft decoration ideas for your play space, consider adding floor cushions with brightly colored pillows and a couple of throw blankets. You could also add some cube shelving for toy storage.

5. Zen Yoga and Meditation Loft

The great thing about a meditation and yoga space is it doesn’t require a lot of stuff. A cozy rug, a yoga mat, and some natural lighting will create the perfect zen space.

If you like to do yoga during the daytime, think about placing your rug or mat right in front of the window where the light comes in. Also, consider adding some real plants to bring nature into your space.

6. Home Office Space Loft

When it comes to a home office, natural light is essential. Especially if you’re working remotely, you don’t want to be sitting in a dark space all day.

Maximize the natural light in your loft space, and position your desk so that you can look out the window. If you have room in your budget, you can also consider adding a skylight or two to increase light.

Design Your Loft Oasis Today

With so many amazing loft design ideas, the hardest choice will be deciding what to do with your space.  Be creative, and, most of all, enjoy your new refuge.

Are you looking for more helpful design ideas? Check out our home section today.

Filed Under: Tips

How Are Online Slots Created?

June 8, 2020

When you play online slots at leading online casinos such as Gold Rush Slots, the same basic principle tends to apply: launch an enticing game, spin the reels and hopefully trigger plenty of bonus features which should see the prizes tally up. But what it is about slots in particular that appeals to people – the soundtrack? Theme? Gameplay, or narrative? We don’t need to worry about it, of course, that’s up to the developers, but to consider the lengthy process from ideal to production can be quite intriguing. After all, the casino software developers are in fierce competition to produce as many high-quality and engaging games as possible.

Player Expectations

By 2024, the online gambling industry is expected to be worth a staggering $73 billion. This is fantastic for slots developers, of course, however, there is a great deal of work ahead. The competition is already intense, and as standard get higher and higher; the expectations of players also increase. The key for slots developers in this case is to produce online slots that truly stand out from the crowd. But, how?

Work in Progress

One might assume that slots online are pretty easy to churn out at a regular pace, but in fact, a slot game of decent quality will actually take around 12 months to develop. The project begins with an end target ideal and a great deal of in-depth research before the final design can even be considered.

As a result, the slots development team includes many people: project managers, designers, mathematicians, developers, for instance. Every small detail must be scrutinised even before the idea of the game is released to anyone outside of the company.

Market research must take place next, in order to discover how well received the slot game is likely to be. The main mission is to appeal to as many players as possible; so how are you going to do this?

Up next is the creative design. Visual design, colour schemes, characters and soundtracks are just a few of the elements that require perfection. Meanwhile, a mathematician will be working hard on the Random Number Generator (RNG) software to ensure entirely fair play thanks to random reel spin outcomes.

Testing

Before the big launch, the game needs to be meticulously and rigorously tested. This testing may lead to last-minute tweaks; each of these will polish and perfect the game that has been in the making for so long.

The Big Launch

Much relies heavily on the launch of a slot game too. At which casinos will the game be available? Naturally, many developers ensure that their game is available to play at multiple casinos in order to increase chances of being enjoyed by players. Furthermore, leading casinos will work hard to promote the new online slot; after all, they are keen to boost their custom too. This might be done via a free spins promotions for the new game, for example. Gaming reviews – both online and on paper – can also have a significant influence on a slot game’s popularity.

Filed Under: Tips

How to Handle Crawl Space Moisture Control in Your Home

June 5, 2020

In 2018, homeowners across America spent a staggering $394 billion on home improvement projects. A number of these projects typically cover solving issues in the crawl space.

As the crawl space impacts the rest of the airflow in your home, you must avoid any humidity that might build up within the space.

Here’s a brief guide to help you better tackle crawl space moisture control in your home.

How Does Moisture Enter a Crawl Space?

If you want to have a more holistic understanding of the need for crawl space moisture control, you first need to grasp how moisture seeps in.

1. A Plumbing Leak

The first thing that likely comes to mind when you think of water on your crawl space is leaks from your plumbing. Many of your supply and drain pipes will run through your crawl space and leak once in a while.

In some cases, an air conditioner condensate pipe that passes through the lower section of the crawl space can be prone to damage.

Due to infrequent checks on such lines, any leaks can continue unabated for a long time. That’s even more so when a pipe doesn’t leak into plastic but rather the dirt or gravel.

2. Foundation Walls

Sometimes, moisture can enter your crawl space from the area outside your property by migrating via the foundation walls.

If there is any wet soil outside your crawl space, moisture can creep right through. That’s because few spaces have exterior perimeter drains or damp-proofing.

Additionally, if you don’t have gutters in your house, then rainwater won’t be directed away from your property. Same thing for downspouts that fail to move water away from the house.

As a result, the water in the yard will ultimately move towards the house and permeate your crawl space.

3. Crawl Space Foundation Vents

The point behind vents in your crawl space is to dry out the area. However, due to water vapor in the air, the opposite can occur.

When outdoor air passes through the vents, it can raise the humidity inside the crawl space. In turn, that creates moisture that clings to the area. Such instances are especially prevalent during the summer months.

4. Uncovered Soil

Uncovered soil in the crawl space tends to be a hidden source of moisture that homeowners can underestimate.

Any time you have uncovered soil in your crawl space, it allows moisture to evaporate into the air inside it. Over time, there will be a build-up that dampens your area.

Fortunately, these days a vapor barrier can help you keep this at bay. When you don’t install such a barrier, you slowly begin accumulating moisture over the years.

How to Dry out a Moist Crawl Space

Once you realize how moisture is creeping into your crawl space, you can assess the extent of the damage and the best way to eliminate it. Some ideas here include:

Removing Moisture From the Materials in the Crawl Space

Using a dehumidifier, you can dry out the wood frames, the crawl space floor area, and the subfloor overhead.

How quickly a dehumidifier will eliminate present moisture will depend on its size as that dictates the number of quarts of water it can evacuate hourly.

Furthermore, the humidifier’s cooling capacity is critical to determining the speed at which you can dry the space.

When you begin drying out the area using this method, you can strategically place several fans for more airflow over the wet surfaces.

Your dehumidifier’s output drain will need a direct connection to a floor drain. Alternatively, you can drain the water outside the house, but that has to be at least ten feet away to avoid seeping back into a crawl space.

Be careful not to begin running any air moving equipment if you suspect the crawl space is contaminated. Pollutants such as mold and asbestos must first be eliminated to make the air safe.

Prevent Moisture From Entering Your Crawlspace Again

Once you dry out the area, you need to take preventative measures to keep moisture at bay in the future. You can do this through:

1. Repairing Plumbing Problems

Several issues with your plumbing can cause moisture to enter the crawl space.

Inspect your plumbing to identify any leaks that might be directly dripping water into the crawl space. Don’t forget to assess the plumbing system in the upper part of your house to detect any leaks that can encourage moisture build-up.

2. Pipe Insulation

As pipes in your house conduct cold water, they can cause moisture to build up. Due to the cooling effect, droplets can form on the exterior of any exposed piping.

To avoid this, you need to insulate your piping. The material covering the pipes will prevent condensation present on the pipe from evaporating into the air surrounding the pipe.

3. Look for Cracks in the Foundation

The foundation is critical in influencing the level of moisture in your crawl space. If there are any cracks, water from outside is likely going to seep into the space.

Furthermore, the soil around the crawl space area can be wet, and any cracks in your foundation tend to allow the moisture to permeate within.

Thus, you need to hire a professional to conduct a thorough inspection of your foundation for any cracks. While you may try to do it yourself, there are small cracks that are difficult for an untrained eye to spot but yet allow moisture into your crawl space.

In addition, you need to make such inspections regular even if there are presently no cracks. Doing so helps you uncover cracks as soon as they happen so you can get ahead of them and avoid building up the moisture in the crawl space.

Keep Your Eye on Crawl Space Moisture Control

Your crawl space significantly affects the quality of air in the rest of the house, directly impacting your health. Thus, it would be best if you carried out crawl space moisture control regularly. Such a plan gives you the capacity to detect any moisture seeping into the space early and nip it in the bud.

Are you a homeowner looking for ideas on how to maintain your home? Check out more of our articles for insightful tips to help you take care of your significant investment.

Filed Under: Uncategorized

A List of Top Tips and Ideas for Lighting Up Your Kitchen

May 31, 2020


C:\Users\Admin\Downloads\modern-minimalist-kitchen-3098477_1920.jpg

When it comes to lighting up your kitchen, you may already have ideas in your head. Perhaps you’re thinking of introducing layers of lighting in the space to make sure that you get appropriate lighting for tasks such as preparing food, as well as other tasks such as eating and even relaxing. The kitchen is a central space in most homes; as such, you need to give ample thought on how to light it right. There’s task lighting to consider, and you also have to think about accent lighting and decorative lighting if you want the space to be pleasant and look great. But if you want to make the kitchen more personalised with the lighting you choose, here’s a list of top tips and ideas for lighting up your kitchen.

  • Think outside the box. Many homes today have open floor plans, and if you have one, then your lighting for your kitchen should fit this as well. When choosing kitchen fixtures, think about how it would relate to the other areas which are seen from your kitchen. Mind you, it doesn’t have to be a complete match, but if you have fixtures in bronze in other areas, for example, then it would be great to have your kitchen lighting fixtures in bronze as well.
  • Whilst pendants over a kitchen island are often a brilliant option, you can go one step further and choose two big pendants over a string or row of pendants, or even a single pendant light over your kitchen island, as recommended by popular lighting fixture suppliers like Diiiz.com.
  • Consider translucent. Instead of opting for an opaque fixture, why not go the translucent route? Fixtures with a lens placed at the bottom can hide the light bulbs set underneath and still provide you with a good glow.
  • Oval-shaped fixtures for the kitchen are a classic, but you can go beyond classic and traditional shapes with rectangular-shaped fixtures and even fixtures with a drum shape, which can make your kitchen look more interesting and unique.
  • Artwork for your kitchen is also an excellent idea, especially since more people are spending time in the kitchen than ever. To add more personality to your kitchen’s look, place artwork on the walls and illuminate this with recessed fixtures that are adjustable as well.
  • Cabinets with a glow. Open shelves are a big trend nowadays, as are glass-front cupboards and cabinets that showcase your favourite cups and plates and pottery. You can choose to add lighting to the inside of your glass-front cupboards, for example, or lighting for your open shelves. What’s more, it can add more dimension to your kitchen and produce a glow at your line of sight, which creates depth.
  • Install lights under your base cupboards and cabinets. These lights can easily illuminate your kitchen’s flooring, which adds a bit of ambience to the space and can serve as a great night light as well.
  • Whilst you’re installing lights under your base cupboards and cabinets, you can also do the same with your counters or worktops. You can simply create a groove underneath the lip of your worktop or countertop and install the proper lights in the space, so when you open your kitchen drawers, you can see better inside, too.

Image attributed to Pixabay.com


Filed Under: Tips

7 Tips on Throwing an Awesome Garage Party for New Homeowners

May 22, 2020

Whether it’s because of limited space, unpacked boxes or because you simply don’t want lots of people traipsing across your carpet, there are many reasons why a housewarming party might turn you off.

Luckily, there’s another room in the house that could be put to use: your garage.

That’s right! Garage parties are in this year, and because the garage is often one of the largest areas in the home and has easy outdoor access with lots of fresh air and natural light, it might very well be the best place to throw your housewarming party.

Here are 7 tips that will help you throw an unforgettable garage party that’ll be the talk of the neighborhood!

1. Tidy Up

Before you do anything to transform your garage into party central, you’ll need to do some cleaning!

Sweep the garage floor to remove any dirt or debris, and dust any shelves or items that will be in sight during the party. Also, remember to remove any cobwebs!

If you can, clear any large or bulky items from the garage and put them somewhere else in the house until the party’s over. This will allow for a bigger space for your guests! If you can’t move these items, you can simply cover them with a sheet!

2. Cover the Walls and Floor

An easy trick for transforming your garage into a party venue is to cover the walls and floor. By doing this, you’re instantly changing the atmosphere and your guests will even forget they’re in a garage at all!

Hang white sheets from the walls to make the room seem brighter. This will also give the effect of an actual party venue as it hides the evidence of the room being a garage.

For covering the garage flooring surface, you can choose to lay down a tarp or to add a colorful rug.

3. Add Seating and Tables

Of course, you and your guests won’t want to just stand around the entire party, so adding some seating is a must.

This part can be as simple or elaborate as you’d like — it’s really just up to you! Simple folding chairs or lawn chairs can be placed around the garage for your guests, or you can bring out some of your seating furniture from inside.

If your guests are going to be dining during the party, you need to have an area where they can sit and eat. You can use an affordable folding table for this part, too.

4. Decorate

Garage party decorations are perhaps the most important parts when it comes to setting up. They’re also the part where you’ll have the most freedom since you’ll be able to incorporate your own style and creativity.

Depending on your party’s theme, choose tasteful decorations like accent rugs, table runners, floral arrangements, and even alternative seating like beanbags. You can even add balloons or sprinkle confetti across the floor for added effect!

5. Add Lighting

Whether you prefer the soft, warm twinkle of dainty string lights or the brightening glow of lamps, you’ll need to bring in some extra lighting.

You can string lights from the ceiling or walls, or place lamps or other lighting fixtures around the garage where you see fit.

6. Provide Food and Drinks

What’s a party without food and drinks?

Your guests are going to be hungry when they arrive, so be sure to have snack foods and appetizers out on tables. If you’re wanting to do more of a dinner party, then you can place a table in the middle of the garage and bring the food out when it’s time.

7. Add Entertainment

Nervous about guests getting bored during your party? There’s an easy way to fix that.

Investing in a game table is the surefire way to keep the fun going in the garage even after guests leave. From ping pong to air hockey to pool (or even a table with all three), there are so many types of game tables out there that’ll instantly upgrade your garage party.

Check out some of these multi game table reviews to see which kind of game table is for you!

Kick off Your Garage Party

Now, you have all the tips you’ll need to throw the best garage party your guests have ever been to! Prepare to be surprised at just how simple and fun these parties can actually be.

If you found this information helpful, be sure to check out our other posts!

Filed Under: Tips

15 Pro Kitchen Designing Tips for a Dreamy Kitchen

May 19, 2020

kitchen in luxury home

Almost 80% of all remodeling projects start in the kitchen. In fact, designing a beautiful kitchen comes second only to bathroom remodeling projects.

Are you thinking about redesigning your kitchen this year? Before you do, it helps to have a plan in place. With these 15 kitchen designing tips, you can create the kitchen of your dreams.

Otherwise, you might miss out on some of the finer details.

By updating your kitchen, you can improve the room’s aesthetics and function. You can also add to your home’s value, too.

Cook up your dream kitchen with these 15 easy tips!

1. Start With a Plan

Before you start removing appliances or stripping old cabinets, start by developing a plan.

What are you hoping to accomplish with your kitchen renovation project? Do you want more storage space? Maybe you’re more focused on turning your kitchen into a gathering place.

Start by searching for inspiration online. You can look at Pinterest boards, renovation websites, and online guides. Then, create a Pinterest board of your own!

Try to separate your ideas between “must-haves” and “want-to-haves.” If it comes down to your budget, you’ll know which beautiful kitchen designs to prioritize.

Explore different textures, materials, and color schemes while you’re at it. You might come up with more than one kitchen design. That’s okay!

Once you have a fully developed plan, you can choose your favorites.

Learning how to design a kitchen comes down to your needs. Think about how you work and move throughout your kitchen when you’re cooking. Where do you spend the bulk of your time?

Think about the problems you’ve encountered in the past, too. For example, you might feel like you don’t have enough counter space.

Then, you can focus on developing solutions within your plan.

Once you have a strong plan, you can maximize your time and start putting these kitchen design tips to work!

2. Consider Storage

When designing a beautiful kitchen, make sure to consider your storage space. Many people neglect to plan for storage when developing their design plans.

You’ll want to utilize every inch of space you can. Maybe you want to push your overhead cabinets to the ceiling. That way, you have extra space and you don’t have to worry about dust collecting.

You can also deepen your drawers to make it easier to find the pots and pans you need. Consider adding shelves within your drawers, too. Keeping everything organized and easily accessible will improve your kitchen’s functionality.

Improving the storage space in your draws and cabinets will free up your countertops.

Where else can you add storage space? For example, you can start using your walls! Utilizing your wall space will improve the kitchen’s functionality and beauty.

Consider adding a metallic strip to one of your walls. Then, hang your knives up! You’ll have easy access to your knives while you’re cooking.

If you don’t want to add a knife strip, add hooks to your walls instead. You can hang your pots and pans up instead of filling your cabinets.

Does your kitchen include an island? You can add a chandelier to hang your pots and pans from, too.

Either way, these kitchen designing tips will help you maximize your kitchen space.

3. Utilize Your Counters

Once you’ve added new storage space throughout your kitchen, take a look at the countertops. Choose a surface that’s beautiful but also easy to work on.

You might want to reconsider using tiles. The grout between each tile can become difficult to clean and maintain. Stainless steel, on the other hand, will scratch too easily.

Instead, consider stunning, smooth granite or marble countertops for your kitchen renovation project.

4. Don’t Forget the Details

Kitchen renovations often cost between $25,001 and $50,000. When exploring different kitchen design tips, make sure to keep your budget in mind. Instead of focusing on huge remodeling projects, try a few smaller ones.

For example, you might consider using salvaged wood within your kitchen to save money. You can also expose old ductwork to create a more rustic look.

Think about your trash, too. You can create a build-in trash bin that’s hidden behind a cabinet to improve your kitchen’s look.

5. Let There Be Light

Make sure your kitchen has plenty of light. Placing the light source behind you will leave the room full of shadows. As a result, you could end up working in the dark.

Instead, try to position the light in front of you. For example, you can place small lights or LED light strips under your cabinets. These lights will shine directly onto your countertops while you work.

No more shadows!

Don’t forget natural light, too. Instead of old blinds, consider updating your kitchen windows with classy white shutters. The natural light will help your kitchen look lively and spacious.

6. Out With the Old

When updating an old kitchen, many people remove old appliances, cabinets, and even their sink. Going out with the old can give your kitchen a fresh start.

After years of use, your faucet is bound to look old and scratched up. Adding a new faucet to your kitchen will improve the aesthetic and functionality. You can even look for a faucet that includes a filter to improve your home’s energy use.

As you look for new sinks, consider different materials and colors. For example, you might choose these cement vessel sinks. These sinks feature anti-scratch and waterproof coating that will ensure they’ll last for years.

Don’t forget to consider your budget as you start stripping old appliances and kitchen features away. You might decide on updating old features to give your kitchen a vintage look. Either way, using these design tips for kitchen renovations will help refresh an outdated kitchen.

As an added bonus, choosing energy-efficient products for your kitchen will provide benefits in the long run!

7. Power Up

As you start using these kitchen designing tips, don’t forget to think about your power sources. You might need to relocate outlets to add new appliances throughout your kitchen.

Many people fail to think about power sources until it’s too late. Try to utilize these kitchen design tips as soon as possible. Otherwise, you might block out potential kitchen space.

Take the time to measure your appliances. Will they fit within the spaces you’ve build for them? If not, appliances like your dishwasher could fail to drain properly.

8. Prioritize Safety

Over 10% of Americans completed a kitchen or bathroom remodeling project in a single year. As you complete your own remodeling project, don’t forget to consider everyone’s safety.

You want to make sure your kitchen is safe and family-friendly, especially if you have children running around.

For example, you might decide against a metallic strip for your knives if your kids sit on the counters often. You can also use safety-conscious elements like rounded countertops instead of sharp edges.

What about your floors? You can use slip-resistant flooring to keep your kitchen safe.

If you have toddlers or pets roaming around, consider positioning your oven higher up. Putting your oven at adult-height will minimize the risk someone will get burned.

9. Check the Floors

Don’t forget those floors! If you choose hardware floors, remember they’ll wear down faster around appliances. Natural stone, on the other hand, is durable.

Plus, it can give your kitchen an earthy feel.

10. Choose a Look

What type of kitchen do you want to design? For a French look, focus on earthy elements like marble along with elegant elements like a chandelier.

If you want more glitz in your kitchen, add shiny metallics instead.

Do you prefer an industrial look? Try steel, stone, and wood materials!

11. Add a Pop

Many homeowners prefer a stunning, white kitchen to keep the room looking clean. If you decide on white decor, add a pop of color within the room. For example, you paint your cabinets yellow or blue glass panels to bright brightness into the room.

12. Focus on Function

As you use these kitchen designing tips, don’t forget to balance functionality with elegance. For example, you can add custom storage cabinets. If you have an island, consider hollowing out the space to add shelves.

You can even tuck chairs under your island to turn your kitchen into a gathering place.

13. Lighten Up

A dark kitchen won’t feel very inviting. Instead, consider a color scheme that keeps your kitchen looking light and bright. You can combine white with yellow or a kiwi-green for a lively kitchen.

What about adding a skylight? Don’t forget, natural lighting can go a long way to breathe life to the room.

14. Pair Styles

If you feel stuck between two styles, combine them! For example, you might decide on bringing contemporary American styles with traditional French decor ideas. Use ironwork to bring a French look into your American home!

15. Beautify With Backsplash

Adding a new backsplash is a fun way to update your kitchen. Instead of an outdated look, have fun with it! Consider using tin tiles to give your kitchen a bright, playful look.

Eat Up: Kitchen Designing Tips for a Fun and Functional Kitchen

Balance functionality and beauty! With these 15 kitchen designing tips, you can discover the kitchen of your dreams that works well, too. Get designing with these 15 tips today.

Searching for more helpful guides? Explore the Tips section of our blog today!

Filed Under: Tips

How Long is a Roof Good For? 9 Signs You’re in Desperate Need of a Replacement

May 11, 2020

Your roof plays an essential role in keeping your family, your home, and all of your belongings safe and sound. Although you might not give it a second thought on a day-to-day basis, it is important to remember your roof! Take some time, several times a year, to look for signs of wear and tear and perform regular roof maintenance.

How can you tell if a roof needs to be replaced? How long is a roof good for? What are some signs of a sick roof?

Read on for answers to all these questions and more!

1. Do Your Shingles Seem Shabby?

Next time you go outside, check out the shingles on your roof. Are they in decent shape, or are they looking a little shabby?

If they are peeling, cracking, warped, curled, or buckled, you will need to get the roofing professionals over to your home right away.

Another telltale sign that your shingles are in poor shape is if there are granules missing. Look for bare or discolored spots on the shingles. In addition, check the areas around your downspouts, where loose granules may accumulate after being washed off the roof.

2. How Long Is a Roof Good For?

This depends on what type of roofing material is topping your home; there are several different types, all with their individual longevity.

Regular old asphalt shingles generally last between 15 and 25 years. Architectural shingles, a premium variety, can last a little longer — more like 30 years.

Wood shingles, also called shakes, also boast about a 30-year lifespan. However, they require much more upkeep than their asphalt counterparts. Many people feel that their good looks are worth the maintenance, however.

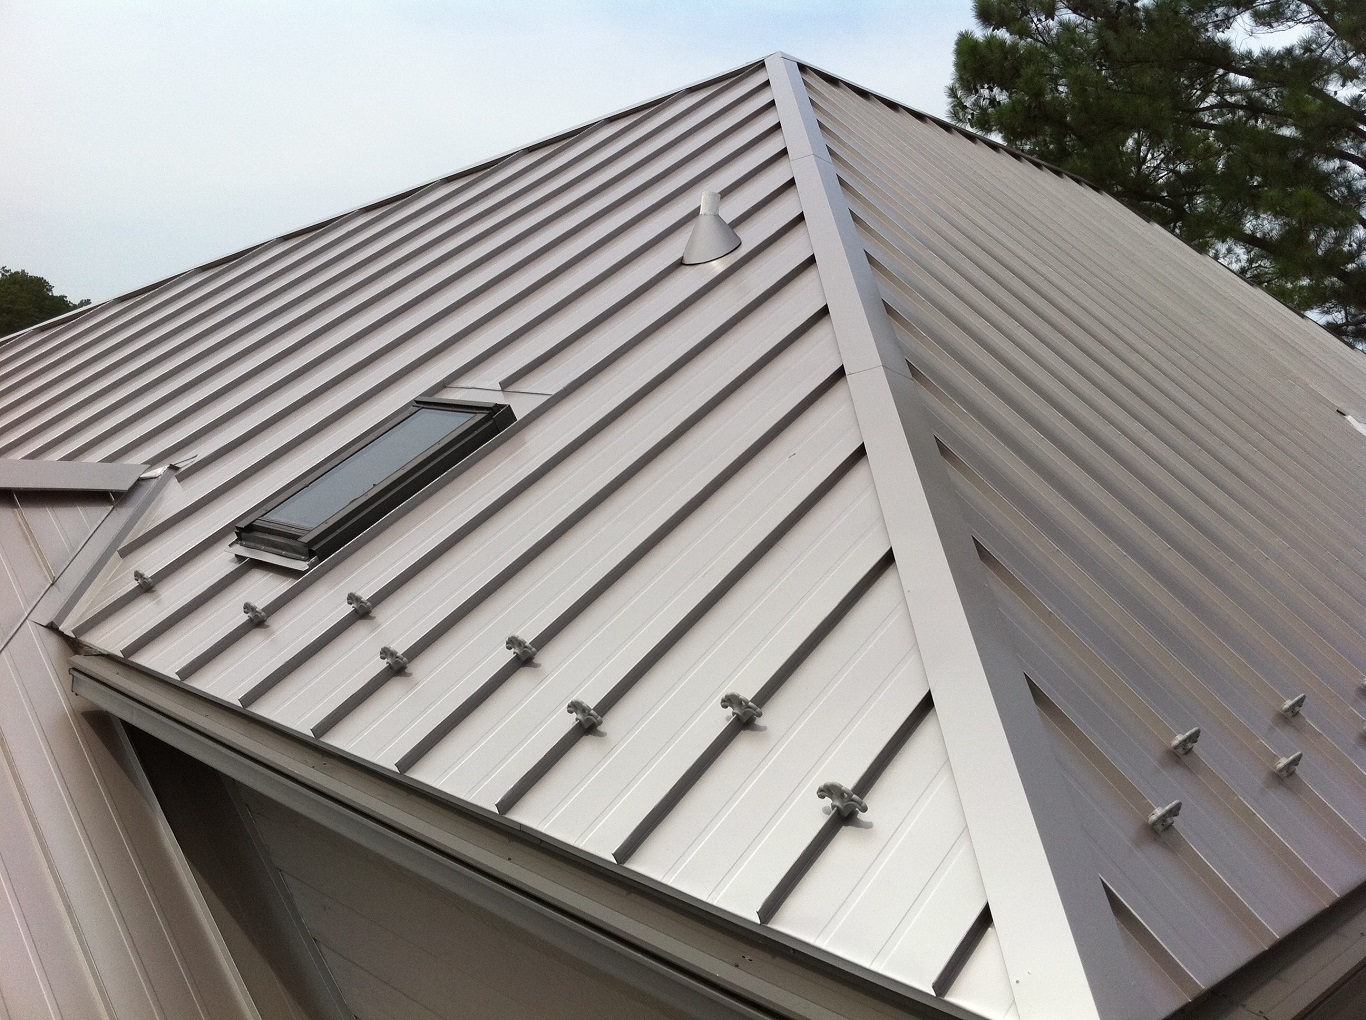
Metal roofs offer more advantages than you may realize, including longevity of up to 70 years. Also on the higher end of the spectrum are clay tile and slate tile roofs, which have been known to hold up for 50 and 100 years, respectively.

3. Does the Flashing Look Faulty?

Flashing is the protective material that surrounds chimneys, vents, skylights, and any other element that constitutes a break in the roofing material. In many cases it is made from roofing tar or cement; in others, it’s made from metal.

Either way, if you see cracks, holes, slippage, or any other issues, have it and the rest of the roof evaluated.

4. What Does the Attic Say?

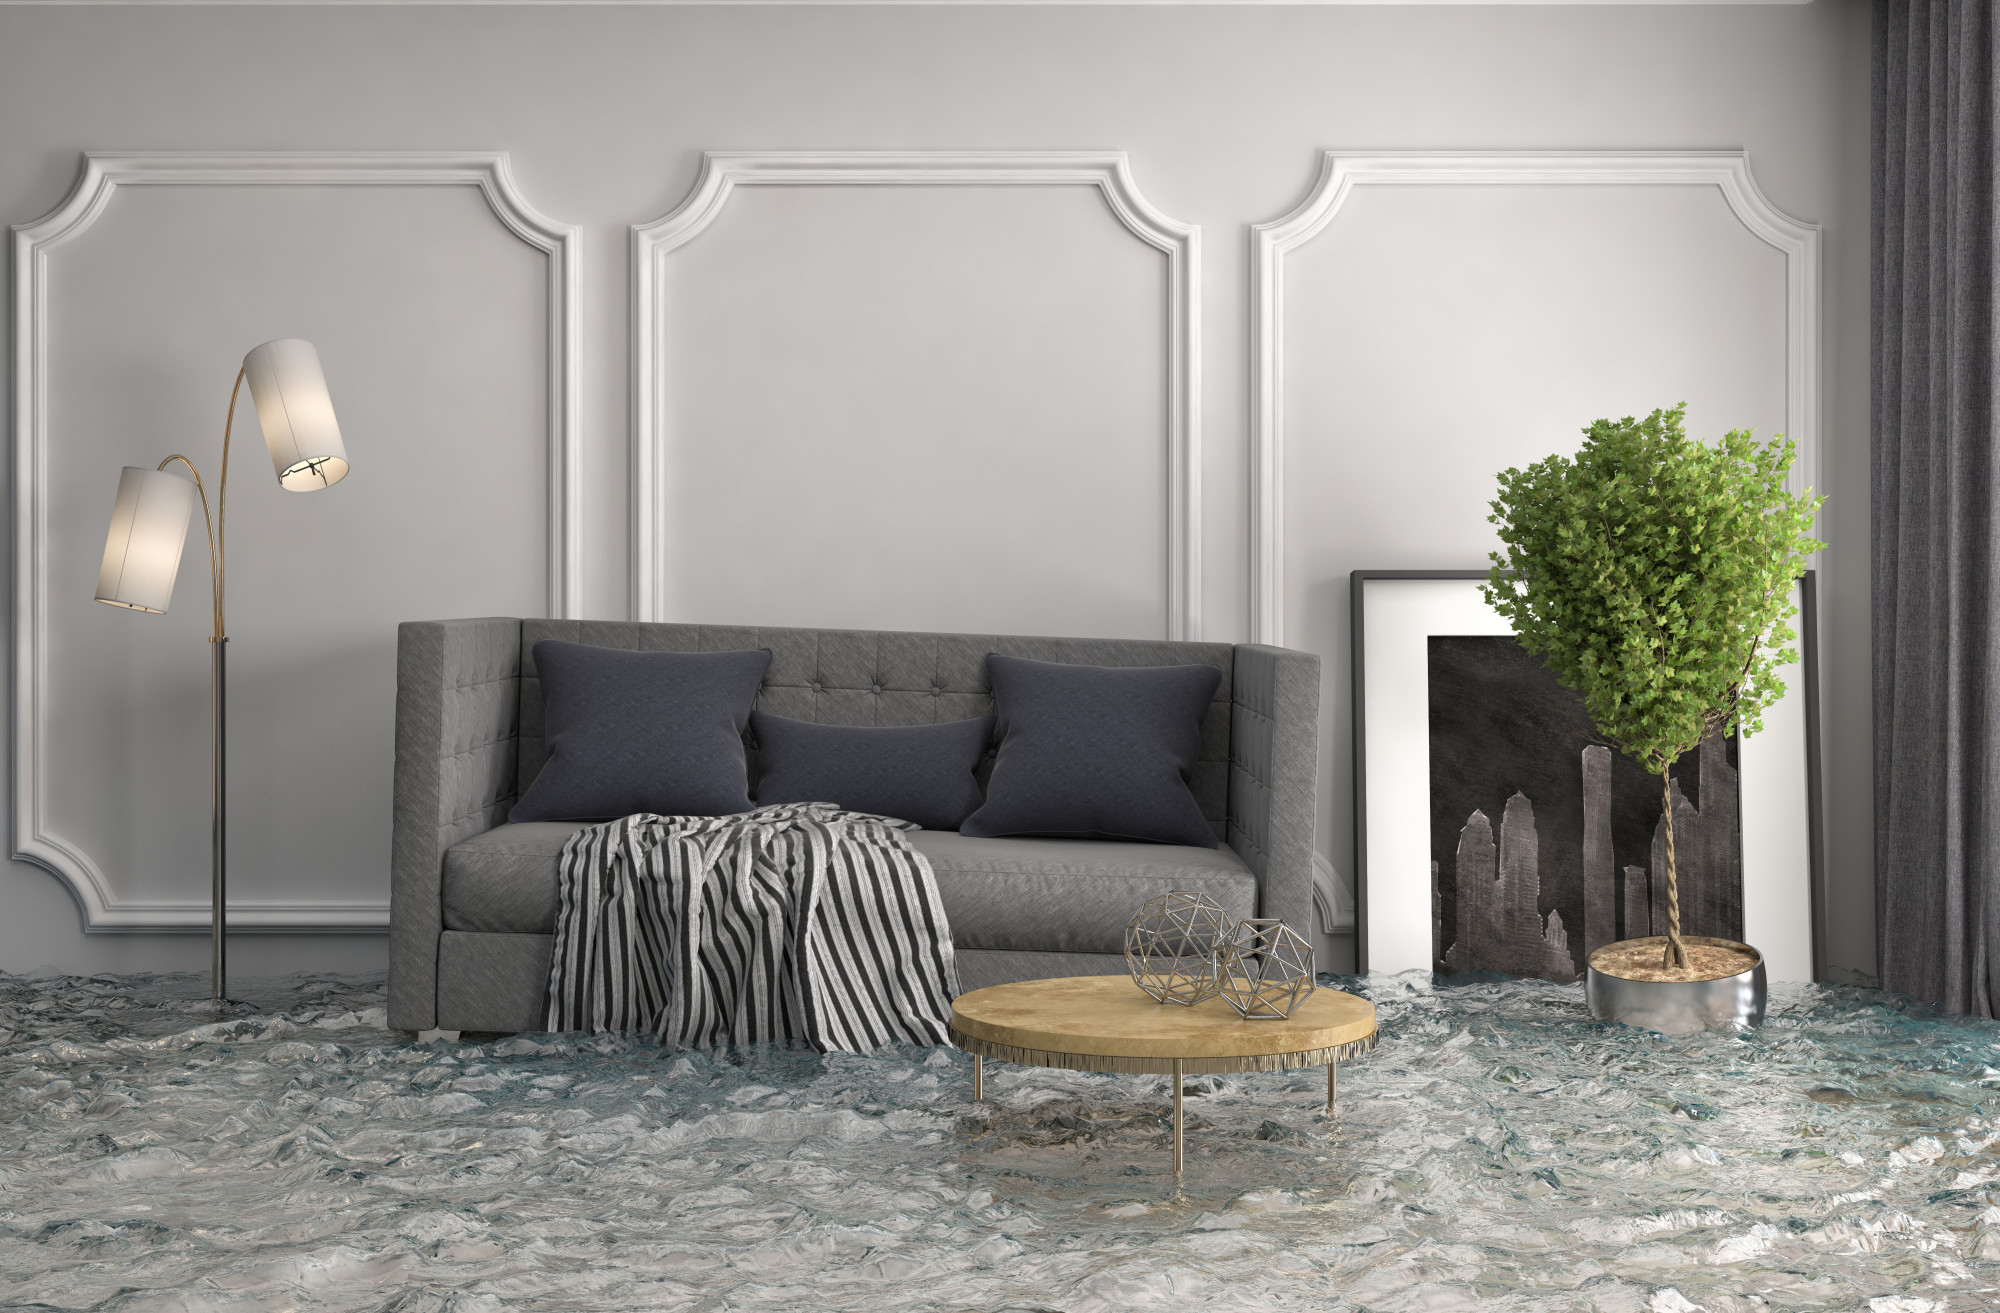
Ask your attic what kind of shape the roof is in! You can do that by heading up there and looking for light shining in through the underside of the roof. You may also see stains, streaks, or even moisture.

All of these are bad signs that point to the need for a roof repair, at the very least, and possibly a replacement.

5. Rot Equals Replacement, Right?

You betcha. Unless you catch it very early, rot in the roofing materials is going to wreak havoc with its overall condition. Almost certainly a roof with extensive rot will lead to a new roof for you, like it or not.

If the roof is visibly droopy or sagging, say sayonara to it and call the roofers.

6. Who Is Boss, You or the Moss?

Moss is another sign that things up on your housetop are no good, boss. While moss certainly has its uses and its appeal down on the ground, on the roof, it’s a sign that there is moisture sticking around.

You should clean off any moss you see on the roof. But don’t think that’s enough to do the job. It’s also necessary to investigate the underlying problems.

7. Do You See Mold or Algae?

Similarly, mold, mildew, and algae are also surefire indicators that your roof is experiencing moist conditions that it can’t seem to shake off, for whatever reason. Although mold travels via airborne spores, it only takes hold when it lands upon housing material or another surface that stays damp.

Mold can easily spread to the inside of your house, and once you see it there, the problem is pretty widespread. So keep an eye on things. If you see algae, take care of it immediately, and check to see if the roof is holding water or moisture.

8. Heating Bills Too High?

In warm seasons or climates, a leaky roof is going to let out the cool, conditioned air; come wintertime, of course, the warmth you pay so dearly for will escape right out of the top of the house.

If you’ve noticed that suddenly your energy bills seem sky high, and nothing else about your usage habits has changed, check into the roof’s condition.

9. Do You Want One?

Lastly, there is no earthly reason you can’t have a roof replacement just because you want one! Maybe you are interested in getting solar panels installed, or you like the look of a tiled roof. Perhaps you just want to hear the pitter-patter of rain on your metal roof! It’s certainly a lovely sound.

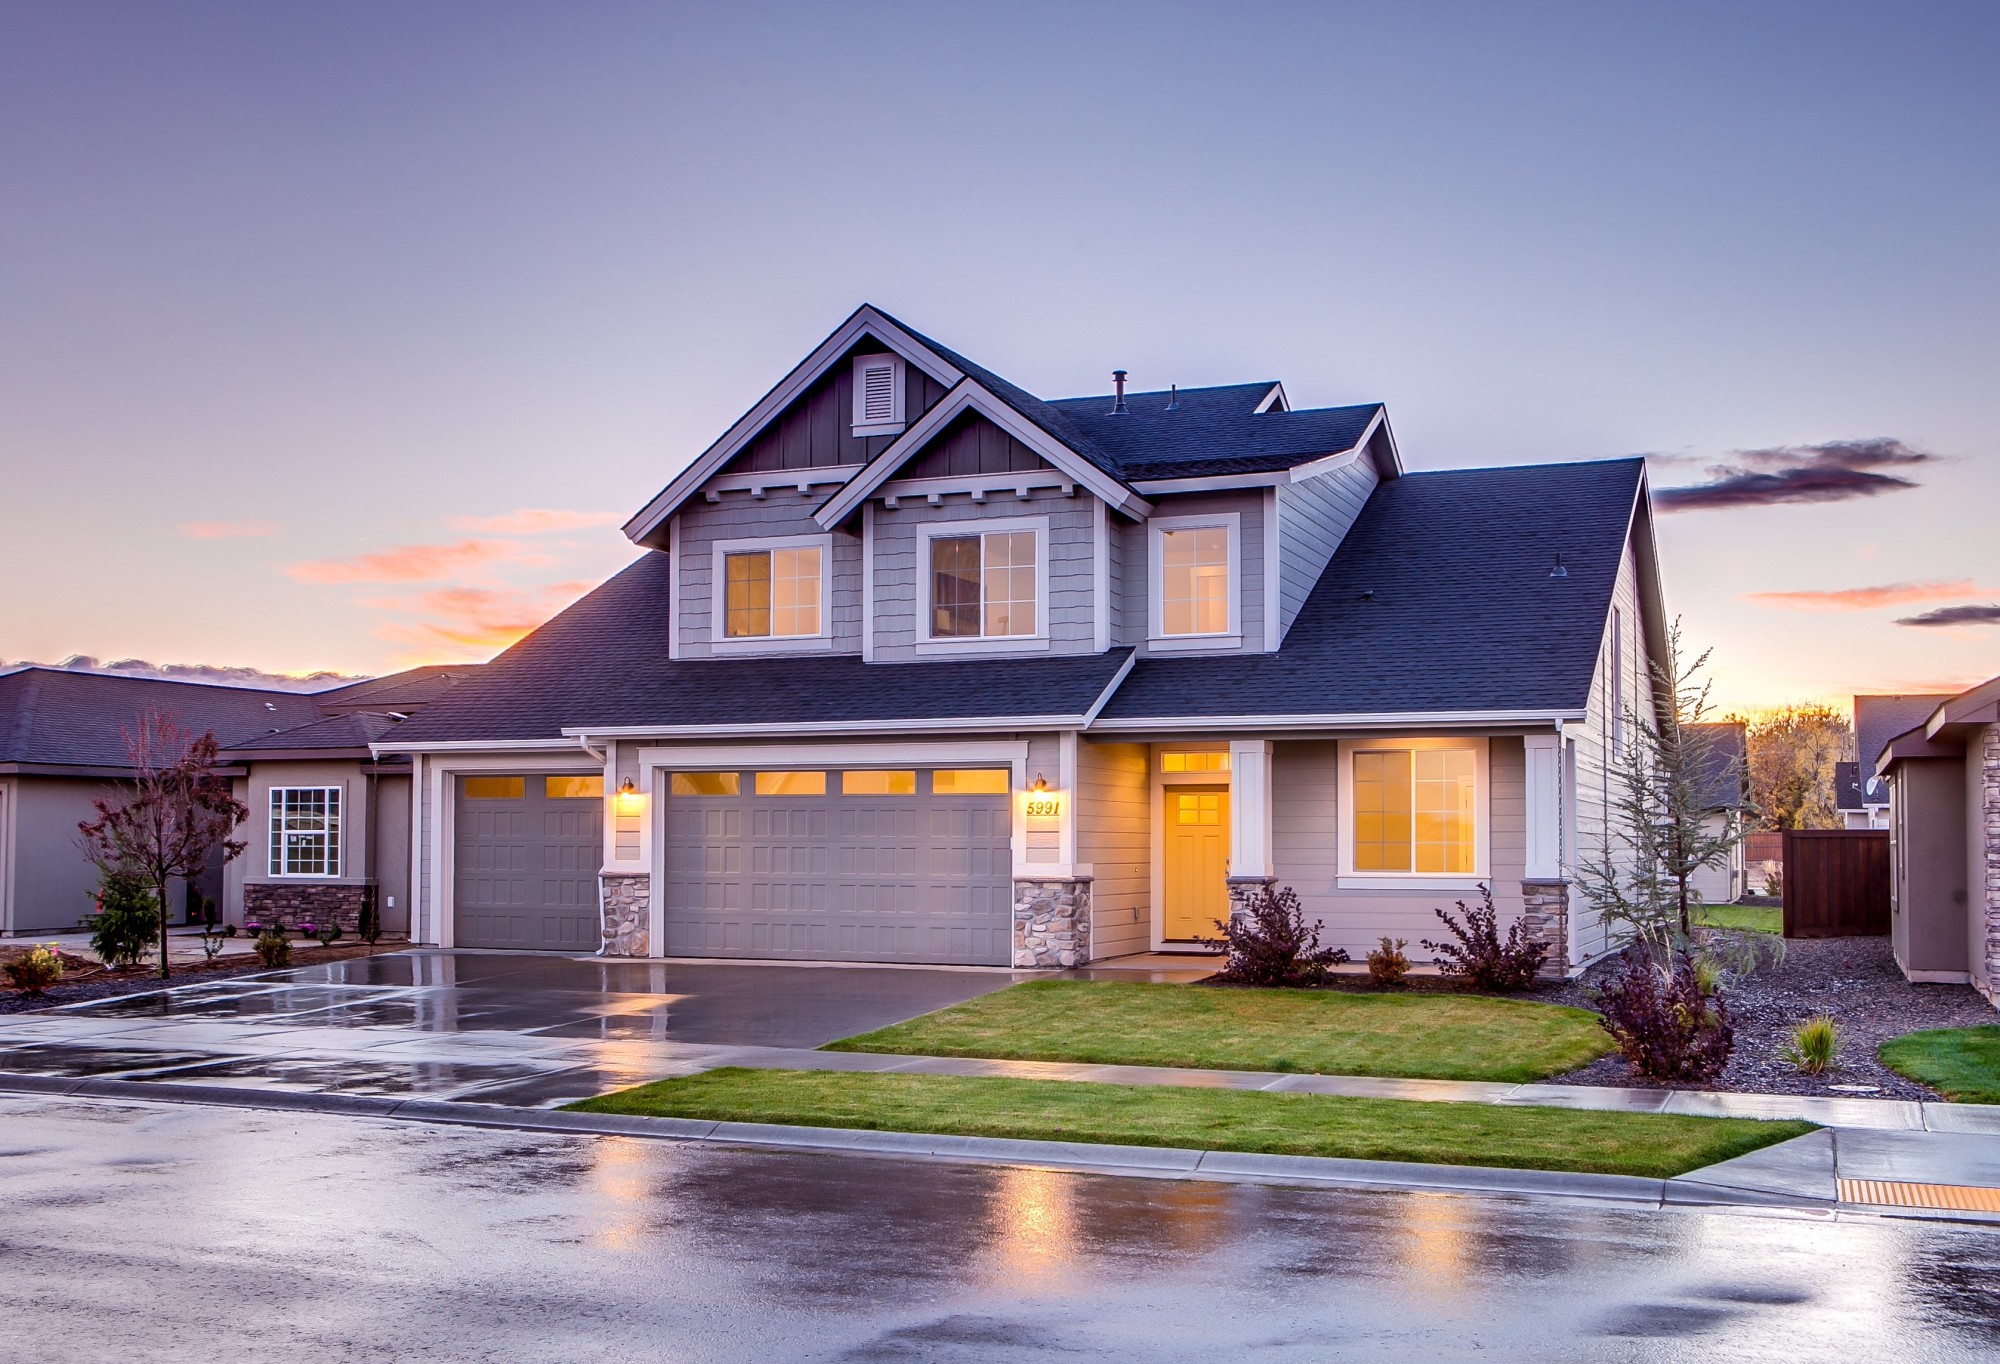
A new roof can definitely increase not just the curb appeal of your home, but also its market value. So this could be an investment to consider if you’re on the fence about replacement now, but want to sell in a few years.

Some people also choose to spring for a long-lasting roof such as a slate tiled one, as a gift for their future selves or for their children. Are you planning on leaving your home to your offspring, and relatively sure they’ll want to live there themselves? Why not gift them with a beautiful roof that they will literally never need to worry about?

When It Is Time for a New Roof

There’s no getting around the fact that a new roof is a big expense, as well as a big project that will probably disrupt your life for a couple of weeks. But it will be necessary to fix any of these problems. And you will have peace of mind, knowing you won’t have to ask “how long is a roof good for?” again anytime soon!

Did you enjoy this article? Why not share it with your friends and followers on social media?

Filed Under: Uncategorized

5 Tips to Help You Destress

May 6, 2020

Stress is normal. It affects all of us at some point or another. But, what do you do when stress is starting to overcome you and affect your daily life?

According to the National Institute on Mental Health, not all stress is bad. However, long-term stress can have lasting effects on your health and quality of life. Over time, chronic stress can begin affecting your “immune, digestive, cardiovascular, sleep, and reproductive systems. If left untreated, stress can even begin to increase your risk for cardiovascular disease, high blood pressure, diabetes, and other mental health issues such as anxiety and depression.

So, it’s best to get your stress in check before it gets out of hand. Check out these 5 tips to help you alleviate stress in your life:

1) Try CBD

In recent years, the benefits of cannabinoids (CBD) have been discussed amongst CBD users and healthcare professionals alike. In 2018, Dr. Peter Grinspoon wrote an article for Harvard Health Publishing where he discussed how CBD has already been successful in treating rare forms of childhood epilepsy in the United States (a treatment that is actually approved by the Food and Drug Administration (FDA)), but there is also evidence to suggest that CBD could be beneficial in treating chronic pain, insomnia, and anxiety.

Since CBD has been a proven treatment for anxiety, it stands to reason that taking a puff or two of some pre rolled joints could be the ideal treatment to get your stress under control. CBD and other products that come from the cannabis flower don’t contain the same amounts of THC as marijuana does. Since there’s little to no THC, you won’t feel “high,” but it can help treat your stress and could even be beneficial for certain types of pain (especially joint pain). Plain Jane offers CBD flower joints in prerolls that are ideal for a no-fuss relaxing experience. Whether it’s Sativa or Indica, a puff from these hemp cone joints are sure to help you destress. If you’re interested in selling CBD roll joints, be sure to read through their company’s privacy policy.

2) Find a Therapist

According to the National Alliance on Mental Health, 1 in 5 adults in the United States experience a mental illness in a given year, 6.9 percent live with “major” depression, and 18.1 percent live with an anxiety disorder.

So, if you’ve been particularly stressed out lately, one of the best things to do could be to look for a qualified therapist using a free people finder through GoLookUp. By using a reverse phone lookup, a reverse email lookup, or a person’s name, you can conduct a free people search and find a phone number, zip code, first name, last name, email address, contact information, public records, social media accounts, and a background check on therapists near you.

3) Take a Walk Outside

According to the Cleveland Clinic, walking reduces stress and, if you walk regularly, you can expect other benefits like weight loss, lower blood pressure, and a lowered risk of a heart attack. Walking outdoors is also ideal for increasing your mood as studies have shown that nature has been linked to reducing stress, according to the American Psychological Association (APA).

4) Take Care of Yourself

One of the best things you can do when you’ve been stressed out is to evaluate whether you’ve been taking proper care of yourself. Stress can cause us to get into some pretty bad habits like “stress eating,” smoking, drinking, etc. According to the APA, when our bodies are stressed, they release adrenaline and cortisol, which affect digestion and can cause fat and sugar cravings. Instead of ditching your favorite foods, however, they recommend a diet high in a variety of nutrients from a “rainbow” of fruits and vegetables to protect your health and give you the energy to combat stress.

The APA also recommends making sure to commit time to sleep and exercise. Taking a brisk walk or dancing can combat stress. They say that exercise not only helps you sleep at night, but studies suggest that exercise can actually “cancel out” some of the negative effects of stress and boost your moods.

5) Do Something You Love

A plethora of sources all suggest stepping away from stressors and doing something you enjoy for handling stress. For example, an article in Harvard Health Publishing suggests “unplugging” (as in avoiding the news, emails, social media, etc.) to “escape the world” for a little bit each day and finding your own ways of “destressing” like taking a bath, reading a great book, or making time for a hobby you enjoy.

Filed Under: Health

The Complete Guide to Navigating the Waters of a Flooded House

May 5, 2020

The last thing any of us would want to experience is having our house getting flooded.

Even if we live in an area that is particularly vulnerable to flooding, we often do not take the necessary precautions. Even after the devastating Hurricane Katrina hit New Orleans, not everyone in the city is properly protected against possible flooding.

So what do you do if you experience a flooded house? If you did not get the time to prepare beforehand, you need to know how to get through this disaster before you can prepare for another crisis.

In this guide, we will show you what to do right after your house gets flooded.

What To Do in a Flooded House

If you do get into the unfortunate situation where you find yourself in a flooded home you want to make sure you take the right steps moving forward.

Make sure you save this guide as a reference so you can always come back to these steps.

1. Stop The Water (If Not an Act of God)

If the cause of the flooding was not by a natural disaster, also known as an ‘Act of God’ then you need to immediately stop the water at its source.

If the flooding was caused by a running faucet in the sink or the bathtub, it needs to be turned off. If your hose was running and the water overflowed, then you should rush to the valve and turn off the hose.

2. Turn Off the Electricity

Once you have turned off the water sources, you have to now turn off the electricity.

First, you should go to the fuse box and turn off the power.

Afterward, you should try to unplug all wires from their outlets. If possible, lift up the wires from the floor and place them on a raised surface; for example, place your wires on the kitchen counter or on the dinner table or on your bed.

If you cannot reach the fuse box or the wires without wading through a lot of water, you should call an electrician.

3. Leave the Home

Now you need to leave the flooded home and make sure everyone else in the home does so.

If there are elderly, children, or any other vulnerable persons in your home – make sure you assist them in evacuating. They should be the first persons to be out of the home.

Once everyone is out of the home, find a safe spot. If the flooding is not so intense, you may be able to stay in your backyard or in the driveway. If it is more serious, you may need to seek a temporary shelter home. This is often the case when the flooding is caused by a natural disaster.

Report the flooding to the authorities and ask them where you should temporarily relocate for shelter.

4. Medical Help

If anyone in your home requires medical help, you should immediately call for an ambulance. This will likely be the case if you have any vulnerable persons in your home.

Make sure this is done right away before moving on to anything else. If you have sustained any injuries or illnesses from the flooding, you must call an ambulance for yourself.

Medical attention cannot be postponed. You need to think about your wellbeing and the wellbeing of your loved ones before you think about the home!

5. What to Do About Your Home

Once you have looked after your wellbeing and the wellbeing of your loved ones, you have to now think back to your home.

If you are a renter, all you have to do is call your landlord and inform them of what has happened. They will be able to handle the rest.

If you are a homeowner, then you need to call your insurer. When speaking to your insurer, make it clear to them how the flooding started.

You should ask them if you are allowed to clean up the house (after the flooding ceases) before the adjuster comes to inspect or if you have to wait for the adjuster to come first

If you don’t have flood insurance, purchase it before the worst happens. This is one of the necessary precautions that is often overlooked. Get it now before it is too late.

6. Document the Aftermath

Once you have taken the above steps, you should try to return to your home to document the aftermath of the flooding.

When you return to the home, take out your phone and take photographs and videos of the damage that has been caused. Make sure you do not miss any spots when documenting the aftermath.

There should be no damaged corner that does not have a photograph or video showcasing the damage. Make sure you keep these photos and videos organized on your phone and ideally, on your computer or a hard drive as well.

If you have photos of your home (prior to the damage) you should have these handy as you may need to show both sets to the adjuster.

7. Cleaning Up

Once the adjuster has looked at the damage and given you the green light, you can start cleaning up the home.

Make sure you disinfect all areas where water was standing. Remove all personal items from the home and throw away any seriously damaged items.

You may need safety gear and a set of supplies for cleaning your home after the flooding.

You should also be aware of the possibility of mold developing after a flood. The best way to avoid mold is to make sure the home is dry and use a strong cleaning fluid (such as bleach) for cleaning the home.

Tackling mold can be challenging, so make sure you follow the instructions so that you do not have to deal with such issues.

Prepare Yourself

Now that you know what to do in the event of a flooded house, you are better prepared. Make sure you keep this guide with you so that if this unfortunate event does happen, you will have less to worry about.

Be sure to check out the rest of the site for more advice on how to prepare yourself and live a great life.

Filed Under: Tips

  • « Go to Previous Page
  • Page 1
  • Interim pages omitted …
  • Page 30
  • Page 31
  • Page 32
  • Page 33
  • Page 34
  • Interim pages omitted …
  • Page 48
  • Go to Next Page »

Primary Sidebar

About

Hi and welcome! I’m Lenny, and this blog space is my Internet home. I write, I cook, and I design. I love to take pictures of all things food and home décor.

Recent Posts

  • 3 Signs Assisted Living Is Right For Your Older Parent
  • E-commerce Store Budget: 3 Tips for Beginners
  • 3 Tips For Setting Boundaries With Your Adult Children
  • 4 Biggest Mistakes People Make When Buying Property
  • 3 Tips For Designing A Beautiful Custom Kitchen

Let’s Connect

  • Facebook
  • LinkedIn
  • Twitter

Facebook

Skipping Stones Design

Latest

3 Signs Assisted Living Is Right For Your Older Parent

E-commerce Store Budget: 3 Tips for Beginners

3 Tips For Setting Boundaries With Your Adult Children

Footer

About

Hi and welcome! I’m Lenny, and this blog space is my Internet home. I write, I cook, and I design. I love to take pictures of all things food and home décor.

LatestPost

  • 3 Signs Assisted Living Is Right For Your Older Parent
  • E-commerce Store Budget: 3 Tips for Beginners
  • 3 Tips For Setting Boundaries With Your Adult Children
  • 4 Biggest Mistakes People Make When Buying Property
  • 3 Tips For Designing A Beautiful Custom Kitchen

Let’s Connect

  • Facebook
  • LinkedIn
  • Twitter

Copyright© 2025 · Dear Theme by Shay Bocks